As a production manager here at ShincoFab’s sheet metal facility, I have spent years on the factory floor watching otherwise good metal parts get ruined because of bad powder coating prep.
Most designers slap a generic black powder coat callout on an AutoCAD or SolidWorks drawing and make it the fabricator’s problem. That is a costly mistake. Design for powder coating is a mechanical rule, not an aesthetic afterthought. If you ignore how the powder builds up or how the part bakes at 400°F, your final pieces can easily fail to fit together.
In this guide, I will show you how to build better metal parts. You will learn the precise dimensional offsets for coating thickness, how to safely vent trapped liquids, and the most cost-effective way to protect your threads.
By baking these rules into your Fusion 360 or SolidWorks model today, you will prevent assembly failures, slash lead times, and stop paying for expensive rework.
1. How Should You Design Metal Geometry for Powder Coating?
Designing for powder coating starts with the physical shape of your part. If your base geometry fights the coating process, your final finish is likely to fail. Here is how to shape your parts for success.
Should You Powder Coat Before or After Complex Assembly?
The line of sight rule is a fundamental powder coating principle that states powder primarily adheres to surfaces directly exposed to the spray gun’s path. Think of the powder coating gun like a flashlight; if the light cannot hit a specific spot on your part, the powder will struggle to reach it.
Avoid welding a complex, tight assembly if you expect the inside corners to get evenly coated. You will likely get hidden bare spots. Those bare metal spots will quickly rust when exposed to moisture.
To fix this, coat individual pieces before you do any final complex assembly.
What is the Faraday Cage Effect in Powder Coating?

Deep pockets and tight U-channels are difficult to powder coat because of the Faraday cage effect in electrostatic powder coating. In deep recesses and sharp internal corners, the electrostatic field favors the exposed edges, so charged powder tends to build up on the outside surfaces while coverage at the bottom of the pocket remains thin or incomplete.
Last month, a client sent us a custom U-channel chassis that was 4 inches deep but only 1 inch wide. The powder failed to penetrate that pocket. We had to pause production and ask them to redesign it into two bolted pieces.
The 1:1 design rule for powder coating states that the depth of a pocket or U-channel should generally not exceed its width. This prevents the Faraday cage effect from repelling powder. To follow this rule in SolidWorks, Fusion 360, or AutoCAD, adhere to these strict dimensional limits:
- Keep your depth-to-width ratio under 1:1.
- If a channel is 2 inches wide, it should not be more than 2 inches deep.
- If a pocket is deeper than it is wide, the powder will likely fail to reach the bottom.
- If you need a deeper pocket, redesign it into two separate parts.
Why Must You Round Off Sharp Edges Before Powder Coating?
Liquid paint drips and builds up on edges. Powder coating does the opposite.
Powder coating naturally pulls away from sharp edges during the 400-degree baking process due to surface tension. This creates dangerously thin areas prone to chipping and rust. To ensure maximum coating durability and edge protection, follow these geometry guidelines:
- Avoid leaving sharp, raw cuts on your 6061 Aluminum or Cold Rolled Steel parts.
- Add a radius of at least 0.030” to all edges.
- A rounded edge holds a thick, even coat of powder that resists flaking.
Does Powder Coating Hide Rough Welds?
Designers often assume powder coating hides ugly welds. It generally won’t. In fact, a glossy powder coat acts like a magnifying glass for surface flaws.
Glossy powder coating magnifies surface flaws rather than hiding them. Rough welds leave tiny pits and sharp peaks where powder cannot adhere properly, creating immediate weak points for rust and corrosion. To prepare raw metal surfaces like Cold Rolled Steel or 304 Stainless Steel correctly before applying powder coating:
- Grind your structural welds flush.
- Sand out any deep scratches or slag.
- The smoother your base 6061 Aluminum or steel, the tougher your final finish will be.
2. How Much Thickness Does Powder Coating Add to Metal?
Powder coating is not invisible paint. It adds real, measurable thickness to your metal. If you ignore this during the design phase, components may fail to fit together on the assembly floor.
What Are the Standard CAD Tolerances for Powder Coating?
A common mistake is specifying a 1-inch hole for a 1-inch pin. Because powder coating builds on the hole wall, it reduces the finished inside diameter; clearance and coating build must therefore be defined before release. Account for the required post-finish fit in your SOLIDWORKS DFMXpress sheet-metal rule parameters or Fusion sheet-metal rule reference, and document the coating thickness and any masking requirement on the drawing.
Powder coating typically adds between 0.003 and 0.010 inches of thickness per side, requiring dimensional CAD offsets to ensure parts fit properly. Because the powder coats both sides of an opening, you must double this clearance. For a standard 1-inch hole, expect these dimensional changes:
- Raw CNC Machined Hole: 1.000″ diameter
- With Standard Gloss Coat (0.003″ buildup per side): 0.994″ diameter
- With Heavy Sandtex Coat (0.005″ buildup per side): 0.990″ diameter
As you can see, a heavy textured coat shrinks your hole by a full hundredth of an inch. Be sure to oversize your cutouts to match your specific powder choice.
How Do You Calculate Clearances for Tab-and-Slot Joints?
This buildup rule applies heavily to sheet metal tab-and-slot joints. If your slots are too tight, the parts will jam. You will end up smashing them together with a rubber mallet.
Sheet metal tab-and-slot joints require specific dimensional offsets to accommodate powder coating buildup. If joints are designed too tight, assembly requires forceful hammering that cracks the cured finish. To ensure powder-coated parts slide together smoothly without jamming, apply these CAD clearances:
- Add 0.010” to 0.015” of extra clearance to all mating surfaces.
- Your parts will slide together smoothly.
- The powder will neatly fill that extra gap.
3. How Do You Protect Threaded Holes During Powder Coating?
Cured powder coating is tough. If it gets inside your threaded holes, you will struggle to screw a bolt in. Managing your hardware and connection points early saves you a massive headache later.
Should You Install PEM Inserts Before or After Powder Coating?
Should you install PEM inserts before or after powder coating? This is a massive debate, but the answer is straightforward.
Press your standard metal inserts in before coating.
Standard 304 stainless-steel and zinc-plated steel self-clinching fasteners are typically installed before powder coating, provided the selected part number and finish are approved for the specified cure cycle. Verify material, finish, installation requirements, and any temperature limitations in the applicable PEM® fastener product catalog before release. Installing self-clinching hardware after coating can damage the finished surface because the process requires high installation force. To manage connection points correctly, follow these hardware guidelines:
- Press metal hardware in before coating.
- Never install standard plastic or rubber components before the oven.
- Clearly mark on your drawing which inserts need to be masked.
How Does Hole Size Affect Powder Coating Masking Costs?
To keep powder out of your threads, the factory has to mask them. Standardizing hole sizes lowers your final bill.
Powder coaters use reusable silicone plugs to protect threaded holes. These plugs come in standard sizes. If you design your part with random, non-standard hole sizes, those standard plugs won’t fit.
Instead, the coater has to hand-cut custom pieces of high-temp tape. Hand-taping takes longer. The longer it takes, the more you pay. Stick to standard bolt sizes (like M4, M6, or 1/4-20) so the shop can insert a standard plug and proceed.
Is it Cheaper to Mask Holes or Re-Tap After Powder Coating?
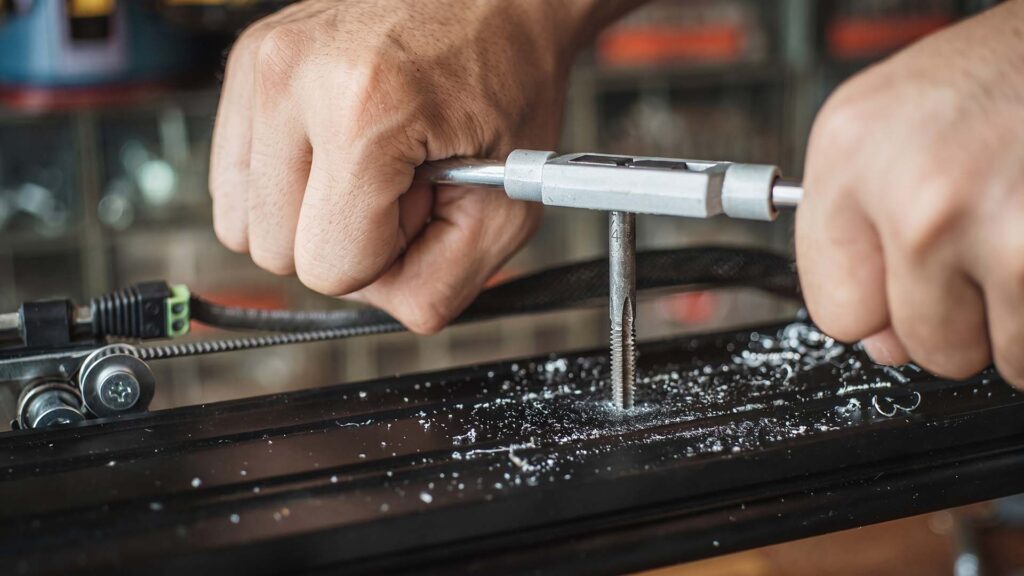
Some designers skip masking entirely. They assume the factory can run a tap through the holes after the coating cures. This is an expensive mistake.
I see this mistake consistently on our floor. Designers assume the factory will re-tap it later. Here is a real cost breakdown based on ShincoFab’s labor operations when we have to fix 50 threaded holes:
- Masking 50 holes: A worker pops in 50 silicone plugs. It takes 5 minutes. At a standard shop rate, this incurs a minimal labor charge.
- Re-tapping 50 holes: A worker has to clamp the part, carefully align a tap, and manually cut the hardened powder out of 50 holes. This takes about 45 minutes, multiplying your labor cost for those holes by nearly 10 times.
Worse, running a tap through a coated hole often chips the surrounding paint. Make it a rule to design for plugs, and explicitly call out your masking requirements on your drawings.
4. How Do You Prepare Metal Parts for the Factory Coating Line?
Before your part ever sees a spray gun, it goes through a chemical wash and a baking oven. If you don’t design for these factory steps, your part will fail on the line.
Why Do Welded Tubes Need Vent Holes for Powder Coating?
Before coating, parts get dunked in a chemical cleaning bath. If you design a sealed welded tube, those liquids get trapped inside.
When that part hits the 400°F curing oven, the trapped liquid boils, turns into gas, and expands rapidly. A powder coating blowout is a severe surface defect that occurs when this expanding gas forces its way out through the melting powder coat, blowing massive holes in the finish.
I’ve personally seen a blowout ruin an entire rack of custom tubular frames in our oven because the designer forgot to add a single vent hole.
You must design vent and drainage holes into tubular frames. A safe rule of thumb is to add a 0.25” vent hole for every cubic foot of internal volume. Place these holes at the lowest point of your assembly so gravity can properly drain the liquids.
How Do You Design Hanging Holes for Powder Coating?

The factory has to hang your part on a metal hook. This exposes all sides to the spray gun and grounds the electrical charge. A standard 0.125” hidden hole provides an ideal solution for this.
Factory hanging holes allow powder coating to reach all sides of a metal part while grounding the electrical charge. A standard 0.125-inch hidden hole works well, but high oven temperatures soften metal, causing heavy parts to warp. Follow these strict weight limits for standard hanging holes:
- 6061 Aluminum: A 0.125” hole will start to tear or deform if the part weighs more than 15 pounds.
- Cold Rolled Steel: A 0.125” hole in cold rolled or mild steel can safely hold about 45 pounds.
If your part is heavier than these limits, design a dedicated, thicker hanging bracket. You can also add multiple holes to distribute the weight.
What if Your Part Can’t Have Permanent Hanging Holes?
Adding a permanent hole is not always an option. It might interfere with the sleek look of your design.
If your part is small, design a break-off tab. Add a tiny, sacrificial tab with a hole in it to the edge of your SolidWorks or AutoCAD model. The factory hangs the part by the tab, coats it, and bakes it.
After the part cools, snap the tab off. You will be left with a tiny bare metal dot where the tab broke away. A quick dab of touch-up paint effectively conceals it, leaving your main surfaces clean.
5. How Do You Choose the Right Powder Coating Finish?
Your part is finally engineered to survive the factory. Now it is time to make it look great. But specifying a finish requires more than aesthetic considerations.
How Does Color Selection Affect Powder Coating Costs?
Color selection appears simple. But your choice directly hits your wallet and your timeline.
If you call out a highly specific, custom RAL color on your drawing, you will likely hit a Minimum Order Quantity (MOQ). Powder suppliers sell in bulk. If you only need a handful of parts coated in a custom neon pink, the shop still has to buy a full commercial bulk box of that powder. They will pass that cost onto you, and waiting for shipping adds weeks to your lead time.
Designing a single part with multiple colors is even more challenging. It requires baking, masking, and baking again. It is highly expensive and risks ruining the first coat.
Whenever possible, stick to the shop’s standard in-house colors. They typically have these in stock. Your parts get coated faster, and you avoid massive minimum buy fees.
What is the Difference Between Epoxy and Polyester Powder Coating?
Not all powders are made of the same stuff. You have to match the chemistry to the environment.
Epoxy powder coating is a durable industrial finish with strong resistance to chemicals, fuels, oils, and mechanical damage, as described in Sherwin-Williams’ epoxy powder-coating product information. However, conventional epoxy powder coatings are generally best suited to interior applications: prolonged ultraviolet exposure can cause chalking, discoloration, and gloss loss. For exterior parts, specify a UV-durable polyester, super-durable polyester, fluoropolymer, or another coating system validated for the required exposure conditions.
Polyester powder coating is an exterior-grade finish that resists intense UV sunlight and harsh weather for years without losing its color. Use Polyester powders for parts that live outdoors.
Which Powder Coating Texture is Best for Hiding Surface Flaws?
High-gloss finishes look amazing on paper. In reality, a glossy finish acts like a mirror. It highlights nearly every scratch, fingerprint, and metal grain mark on your raw 5052 Aluminum or Cold Rolled Steel part.
Unless your bare 304 Stainless Steel or 6061 Aluminum is flawlessly polished, avoid high gloss. Instead, use a textured finish.
Sandtex or wrinkled powders are your best friends here. They feel a bit like fine sandpaper. These rough textures scatter the light. This effectively hides minor blemishes, tooling marks, and fingerprints. They also give your parts a rugged, professional look while providing extra grip.
Conclusion
A premium powder coat doesn’t happen by accident. It happens natively in SolidWorks, AutoCAD, or Fusion 360.
By planning for extra thickness, protecting your threads, and adding vent holes early, you take firm control of the final result. You stop crossing your fingers and hoping the parts will fit. Instead, you get the precise results you designed, on time, and without paying for expensive rework.
At ShincoFab, we handle custom sheet metal fabrication every day. We quickly notice when a designer understands these rules. When a file comes in with proper clearances, masking instructions, and hanging tabs already built-in, it allows us to process the job smoothly and deliver a high-quality part much faster.
Apply these rules to your next build. Your fabricator will thank you, your assembly line will run smoother, and your metal parts will look better than ever.