As metalworking professionals handling tons of brass at ShincoFab each year, we melt, cast, and machine brass every single day. We know firsthand that guessing furnace temperatures does more than ruin parts. It wastes serious time and money on the factory floor.
If you are looking for the brass melting point, you need more than a number on a periodic table. You need to know how that heat actually affects your specific project.
In this guide, you will exactly what to expect. We will give you the exact melting ranges for the most common brass grades we run through our own machines. But we won’t stop there. We will also show you how to melt brass safely, sort your unknown scrap (a daily reality in our shop), avoid toxic zinc fumes, and troubleshoot frustrating casting disasters like pitted or chunky pours that every one of our apprentices has made at least once.
Stop guessing with your furnace and breaking your CNC tools. Let’s get straight to the numbers.
What is the Melting Point of Brass?
The Quick Answer
Let’s cut right to the chase. The melting point of brass sits between 900°C and 940°C (1650°F to 1725°F).
Unlike water, which freezes and melts at 0°C, brass is an alloy. An alloy is a mixture of different metals. Because it is a mix, it has a temperature range instead of a single, hard number.
Why Brass Melts Across a Temperature Range (Solidus vs. Liquidus)
You might hear metal workers use fancy words like solidus and liquidus. Do not let that confuse you. Here is what they actually mean:
- Solidus: The temperature where the brass starts to melt.
- Liquidus: The higher temperature where the brass becomes 100% liquid.
What happens between these two numbers? You get the “mushy zone.”
In this zone, your brass looks and acts like a glowing hot slushy. The zinc inside the brass starts to melt early, but the copper is still holding onto its solid shape. It is a mix of solid chunks and liquid metal.
Why should you care about this? Because you cannot pour mushy brass into a mold. In our early days at the foundry, we saw apprentices try to rush the process and pour in this state. If you try, the metal will clump up, trap air, and ruin your casting —meaning you have to scrap the part and start the melt all over again.
To get a smooth, clean pour, you must push your furnace heat past that liquidus line.
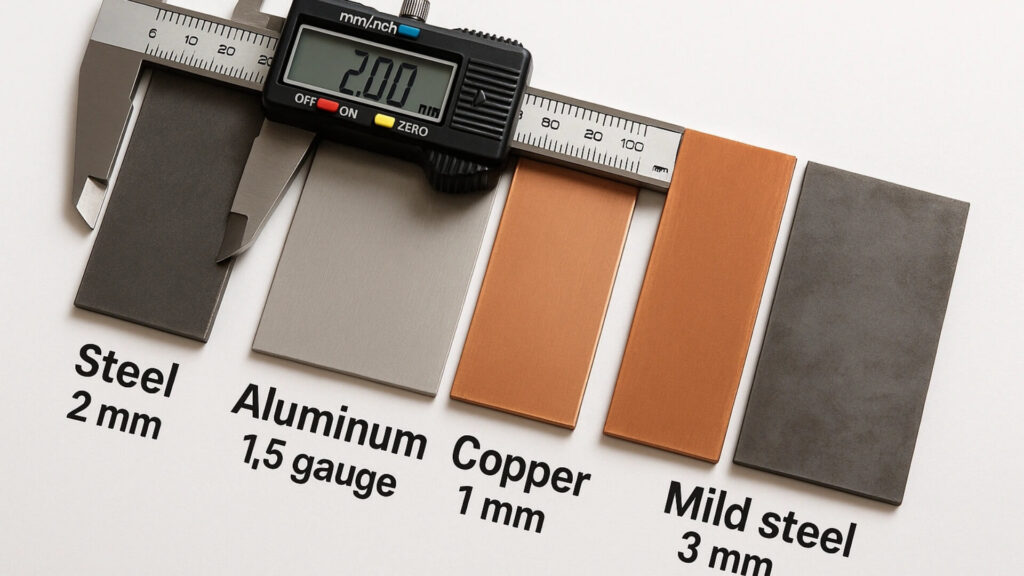
How Does the Melting Point of Brass Compare to Other Metals?
It helps to look at brass next to the other metals in your shop. Before diving into the details, here is a quick reference guide on how its melting point shapes up on our factory floor:
| Metal Type | Melting Point (°C) | Melting Point (°F) | Fabrication Reality on the Shop Floor |
|---|---|---|---|
| Aluminum | 660°C | 1220°F | Melts fastest, but finished parts handle daily wear and tear less effectively than brass. |
| Brass (Average) | 900°C – 940°C | 1650°F – 1725°F | The thermal sweet spot. Saves furnace fuel compared to copper, while turning out durable, heavy parts. |
| Bronze | 950°C – 1050°C | 1740°F – 1920°F | Tougher to melt than brass, requiring more heat. Slightly less fluid for highly detailed mold pours. |
| Pure Copper | 1085°C | 1985°F | Extremely stubborn. Hard on furnace linings and takes the most time and energy to melt. |
Brass vs. Pure Copper
Pure copper is stubborn. It melts at a scorching 1085°C (1985°F).
When you add zinc to copper to create brass, the melting point drops significantly.
- The Benefit: Brass is much easier on your furnace. You burn less fuel and melt the metal faster. We actively track our utility bills, and running our furnaces for brass is significantly more cost-effective than our pure copper runs.
Brass vs. Aluminum
Aluminum melts at a much lower 660°C (1220°F). You can almost melt it over a hot campfire.
Brass requires a real foundry setup with serious heat.
- The Benefit: While aluminum is faster to melt, brass gives you a stronger, heavier, and more durable part. It handles daily wear and tear much better.
Brass vs. Bronze
Bronze is the close cousin of brass. But instead of zinc, bronze mixes copper with tin.
Tin does not lower the melting point as much as zinc does. Because of this, bronze needs more heat. It usually melts between 950°C and 1050°C (1740°F to 1920°F).
- The Benefit: Brass requires less heat than bronze. It also flows perfectly when liquid, making it your best choice for pouring into highly detailed molds.
Brass sits right in the sweet spot. It is tougher than aluminum, but much easier to melt than pure copper or bronze.
This thermal sweet spot reduces fuel consumption and minimizes equipment wear, directly translating to measurable cost savings on the shop floor.
Why Knowing This Temperature Saves You Time and Money
Heating a furnace is not cheap. Machining hard metals takes time.
When you understand the exact melting point of brass, you stop guessing. You start optimizing. Here is how this lower melting range translates to real-world savings for your shop, just as it does for ours.
Cheaper Casting and Forging
Every extra degree of heat costs you gas or electricity.
Because brass melts at a moderate 900°C (1650°F), you avoid the extreme heat required for steel (1400°C+) or pure copper.
- You save on fuel: Reaching 900°C takes a fraction of the time and energy compared to hotter metals.
- Your gear lasts longer: Extreme heat destroys furnace linings and degrades crucibles. By strictly locking our foundry temperature controls around the 940°C mark for brass, we’ve extended the lifespan of our graphite crucibles by months.
- You turn out more parts: Faster melting means you get more pours done in a single afternoon.
Faster CNC Machining
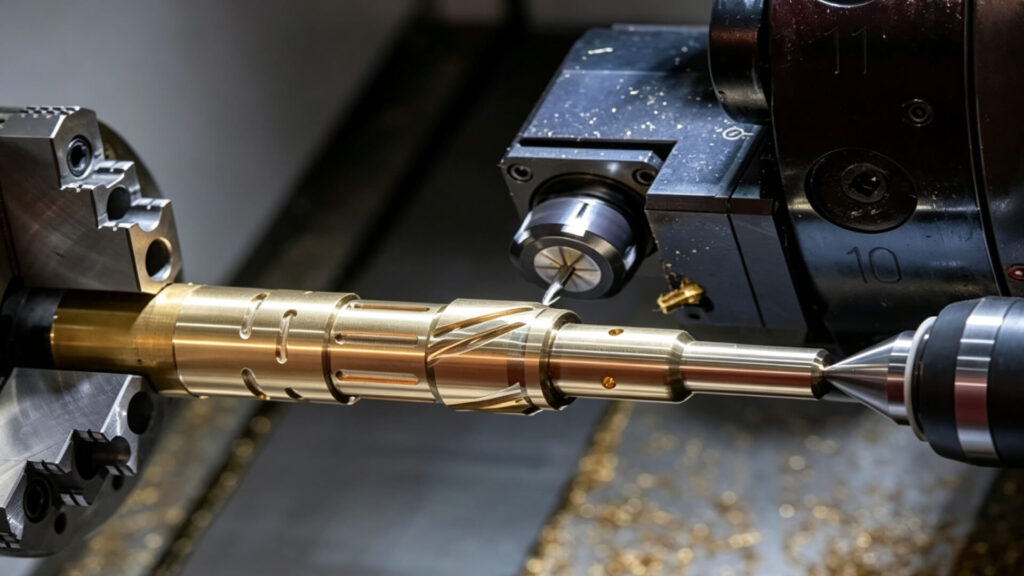
If you cut metal on a mill or lathe, friction is your enemy. Friction creates intense heat.
Because brass has a moderate melting point and great thermal conductivity, it pulls that heat away from your cutting tool. It acts like a built-in heat sink.
- Fewer broken tools: Your expensive end-mills and drill bits stay cool and sharp. On our Haas and Amada CNC machines, we rarely have to stop production to hunt for replacement carbide inserts when working with brass compared to stainless steel.
- Higher cutting speeds: Because the heat dissipates so quickly, you can run your machines much faster.
- Cleaner finishes: The metal cuts easily without melting, warping, or sticking to your cutting edge. You get shiny, perfect parts straight off the machine.
Beyond the base 900°C–940°C range, specific alloying elements—like lead, tin, or excess zinc—will continuously shift the metal’s exact liquidus point.
How Ingredients Change the Melting Temperature
Think of brass like a recipe. The two main ingredients are copper and zinc. But you can tweak the recipe to change how the metal behaves.
How Does the Copper-to-Zinc Ratio Affect Melting Point?
Copper is the tough ingredient. Zinc is the soft one.
Pure copper melts at a blazing 1085°C (1985°F). Pure zinc melts at a low 420°C (788°F). Because of this, the rule for brass is simple: More zinc means a lower melting point.
If you need a metal that melts fast and flows easily into a mold, look for brass with a high zinc content. It saves you furnace fuel and quickens your pouring time.
The Impact of Extra Elements
Sometimes, manufacturers add a pinch of other metals to the mix. Even a tiny amount will shift the melting numbers.
- Lead: Drops the melting point. It acts like a built-in lubricant, making the brass super easy to cut on a machine.
- Tin: Raises the melting point slightly. Tin makes the brass tough and fights off saltwater rust. It is perfect for boat parts.
- Aluminum: Pushes the melting point even higher. It makes the brass incredibly strong, but you will need a hotter furnace to melt it.
Knowing what is inside your metal is half the battle. Now, let’s look at the exact melting temperatures of the most popular brass grades you will buy and use.
Melting Points of Popular Brass Grades

When you buy brass, it usually comes with a specific grade number or name. Let’s look at the temperatures for the most common types we regularly stock in our materials yard.
| Brass Type / Grade | Common Composition | Melting Point Range (°C) | Melting Point Range (°F) | ShincoFab Top Application |
|---|---|---|---|---|
| Free-Cutting (C360) | Includes ~3% Lead | ~ 885°C | ~ 1625°F | High-volume CNC milling and lathe turning (clean chips, less tool wear). |
| Yellow Brass | ~ 60% Cu / 40% Zn | ~ 905°C | ~ 1660°F | Excellent for general foundry casting and decorative parts due to low melting heat. |
| Cartridge Brass (C260) | 70% Cu / 30% Zn | 915°C – 955°C | 1680°F – 1750°F | Formed enclosures and parts that need to stretch and bend smoothly without cracking. |
| Red Brass | High Copper (>80%) | ~ 990°C | ~ 1810°F | High-strength plumbing fixtures and heavy-duty valves. |
Red Brass vs. Yellow Brass
You will mostly hear about two main camps: Red and Yellow.
Red brass is packed with copper. That high copper content gives it a reddish tint. It also pushes its melting point much higher, usually near 990°C (1810°F).
Yellow brass contains a lot more zinc. As you know, more zinc means a lower melting point. Yellow brass usually melts around 905°C (1660°F). If you want an easier time melting metal in your backyard foundry, yellow brass is your best friend.
Cartridge Brass (C260)
This is the heavy lifter in the manufacturing world. Cartridge brass uses a 70% copper and 30% zinc mix.
It melts between 915°C and 955°C (1680°F to 1750°F). It got its name, Cartridge Brass, because it is the standard alloy recognized by the Copper Development Association (CDA) for forming firearm ammunition casings. It is famously tough, yet stretches and bends smoothly without cracking.
Free-Cutting Brass (C360)
If you run a mill or lathe, you probably love C360. This grade contains about 3% lead.
The lead acts like a built-in lubricant for your cutting tools, causing the metal chips to break off cleanly. But it also does something else. It drops the melting point way down to 885°C (1625°F). You get faster cuts, less tool wear, and a much easier time melting it down. In our fabrication department, C360 is our go-to choice when a client needs complex, high-volume threaded parts delivered fast.
But here is the catch. While chasing these melting temperatures, it is incredibly easy to accidentally overheat your furnace. Push the heat a little too far past these numbers, and you enter a very dangerous zone.
The Danger Zone Between Melting and Boiling Points
Heating brass is a delicate balancing act. You want it fully liquid, but you cannot push the heat too far. We treat this as a strict compliance issue on our factory floor.
What is Zinc Volatilization?
The main problem with overheating brass is the zinc. Zinc melts at a low temperature, but it also boils low.
It turns into a gas at 907°C (1665°F). Notice something scary about that number? It sits right inside the normal brass melting range!
If you crank your furnace too high, the zinc literally boils out of the liquid metal. Experts call this zinc volatilization. You will see it shooting out of your crucible as a thick, white smoke. When we train new operators, seeing this smoke is an immediate signal to cut the heat.
How to Prevent Toxic Zinc Fumes
That thick white smoke pouring out of an overheated crucible is not just a sign of ruined metal. It is a cloud of highly toxic zinc oxide.
Breathing these fumes causes a brutal condition known as metal fume fever. This is not a myth; it is a serious occupational hazard we engineer out of our facility.
Luckily, you can easily prevent it:
- Control your heat: Keep your furnace hot enough to reach the liquidus point, and no hotter. We use calibrated digital pyrometers on every furnace for this exact reason.
- Use ventilation: Always melt outdoors or under a heavy-duty industrial exhaust hood. Our shop is equipped with industrial downdraft tables and overhead extraction systems.
- Wear the right gear: A standard dust mask will not save you. Our factory safety protocol mandates that operators must wear a high-quality P100 respirator mask that meets OSHA’s respiratory protection standards for metal fumes.
While proper temperature control prevents toxic zinc fumes, safe melting also depends on identifying exactly what type of scrap brass is entering your crucible.
The Hidden Dangers of Melting Scrap Brass
Buying brand-new brass ingots gets expensive fast. Because of this, most people prefer to melt down old plumbing fixtures, broken keys, or spent bullet casings.
But grabbing a random bucket of scrap is a massive gamble. As a facility that generates and processes large bins of offcuts daily, we know this trap well.
Why Unknown Scrap is Risky
Throwing a random mix of scrap into a hot crucible usually spells trouble.
Not all brass is created equal. If you mix a handful of free-cutting brass with cartridge brass, their melting points will clash. Your metal will melt dangerously unevenly.
Worse, old scrap hides nasty impurities. A shiny old water valve might contain iron, dirt, or heavy chemical coatings. These hidden ingredients throw your melting temperature completely off balance. You might expect a perfect liquid pour at 900°C (1650°F), but end up with a clumpy, unusable mess that ruins your mold.
How to Sort and Test Your Scrap
Do not let bad metal ruin hours of hard work. You can easily avoid disaster with a few quick checks before you ever turn on the heat.
- The Magnet Test: Brass is not magnetic. If a magnet sticks to your pipe or fitting, throw it out immediately. It is just steel hiding under a fake brass coating.
- The Spark Test: Touch the metal to a bench grinder. Solid brass makes very short, dull sparks. If you see long, bright sparks that look like shooting stars, you are holding iron or steel.
- The Scratch Test: Take a heavy metal file to the surface. Sometimes what looks like brass is cheap zinc painted gold. If it shines silvery-white underneath the scratch, it goes in the trash.
Sort your pile, toss the junk, and keep the good stuff. With a bucket full of clean, tested scrap, you are finally ready to fire up the furnace. Let’s melt some metal.
How to Melt Brass Safely Step by Step
Melting brass is not like baking a cake. It takes high heat, thick gear, and a solid plan to avoid ruining your metal or burning down your shop. Let’s do it the right way.
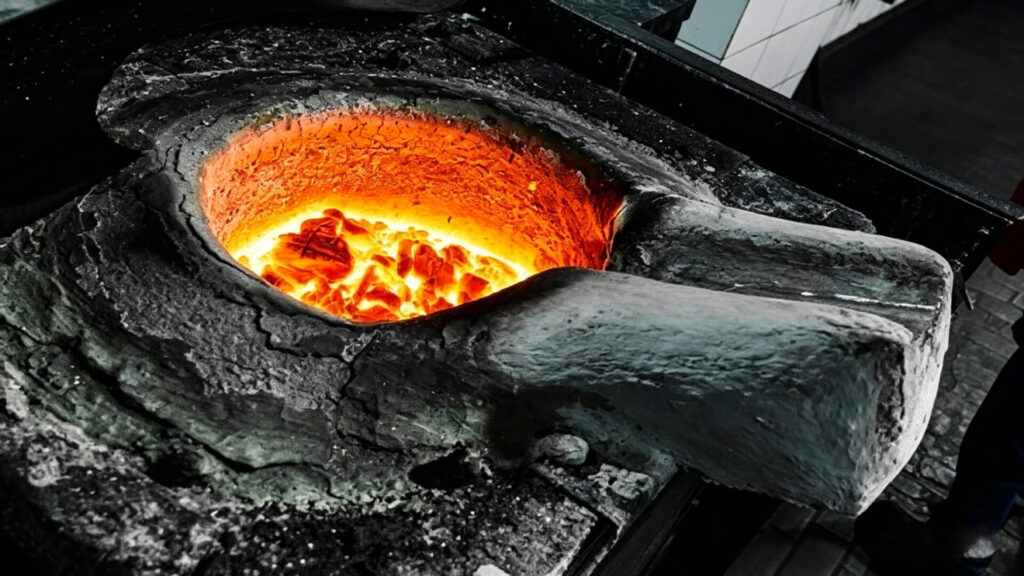
Setting Up Your Furnace and Crucible
Your campfire will not cut it. You need a gas or induction furnace capable of hitting 1100°C to 1200°C (2000°F to 2200°F). You always want a furnace pushing more heat than the melting point of brass.
Place a tough graphite crucible inside. Graphite handles the heavy heat and resists chemical attacks from melting brass. Make sure the crucible matches the size of your pour. Finally, pull on your heavy leather gloves, face shield, and P100 respirator.
Cleaning and Prepping the Metal
Do not throw greasy, dirty scrap into the furnace.
Oil, dirt, and paint burn into nasty slag, which ruins the metal’s purity and alters the melting point. Sandblast your brass pieces or drop them into an acid pickle to eat away the grime. The cleaner your metal, the smoother it melts.
Adding Flux and Skimming Dross
Once the brass turns into a glowing, slushy orange liquid, it is time to clean house.
As the brass melts near 900°C (1650°F), impurities float to the top. This crusty, nasty layer is called dross. To fix it, toss in a small pinch of flux like borax. The flux acts like a magnet for the dirt. It turns the oxides into an easily removable skin.
Take your long steel skimming tool and scrape that dross layer completely off the top of the molten metal.
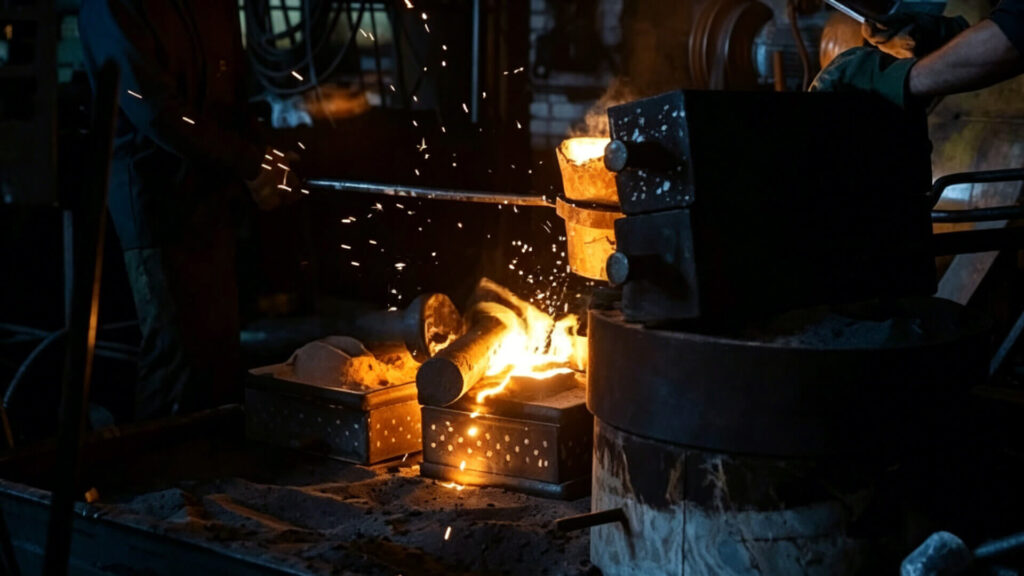
Pouring and Cooling
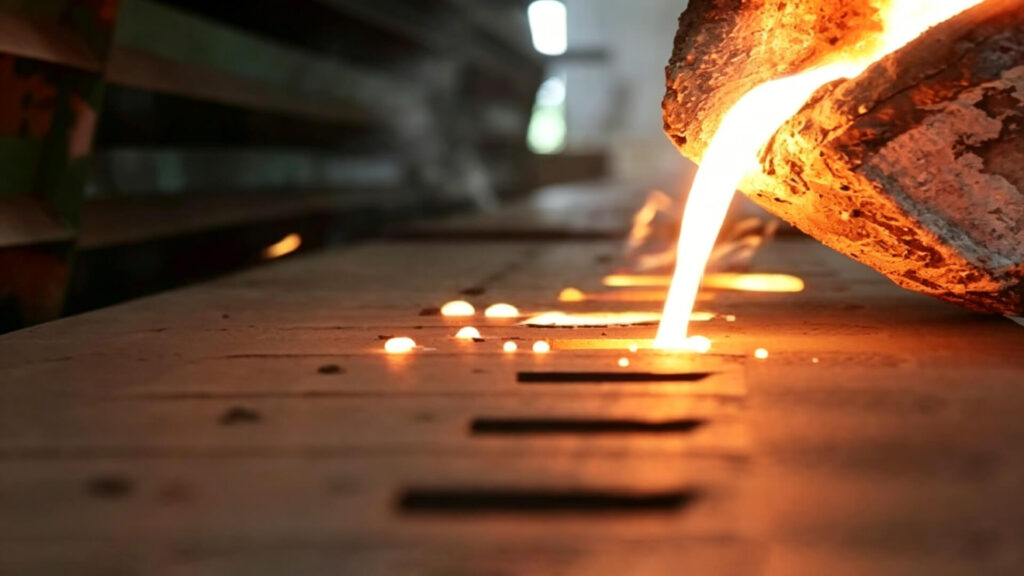
Now, the metal is fully a liquidus state. Do not waste time. If you leave it in the furnace, the zinc boils away into a toxic white cloud.
Grab your lifting tongs. Pour the brass in a single, smooth, continuous stream. If you stop and restart, you trap air bubbles inside the mold.
Once your mold is full, step back. Brass needs slow, steady cooling to shrink evenly and form a strong crystal structure.
Wait an hour or more, then crack open your mold to reveal your shiny new brass part. But if things look a little funny when you pull it out, do not panic. Every metalworker faces a bad pour eventually. Let’s fix the most common casting disasters.
Troubleshooting Common Brass Melting Fails
You open your mold and excitedly pull out your new part. But instead of smooth metal, it looks awful. Mistakes happen, but understanding the melting point of brass gives you the power to fix them fast.
Here is how to solve the two most common casting disasters that we traditionally see during prototype runs.
Why Did My Casting Come Out Pitted and Bubbly?
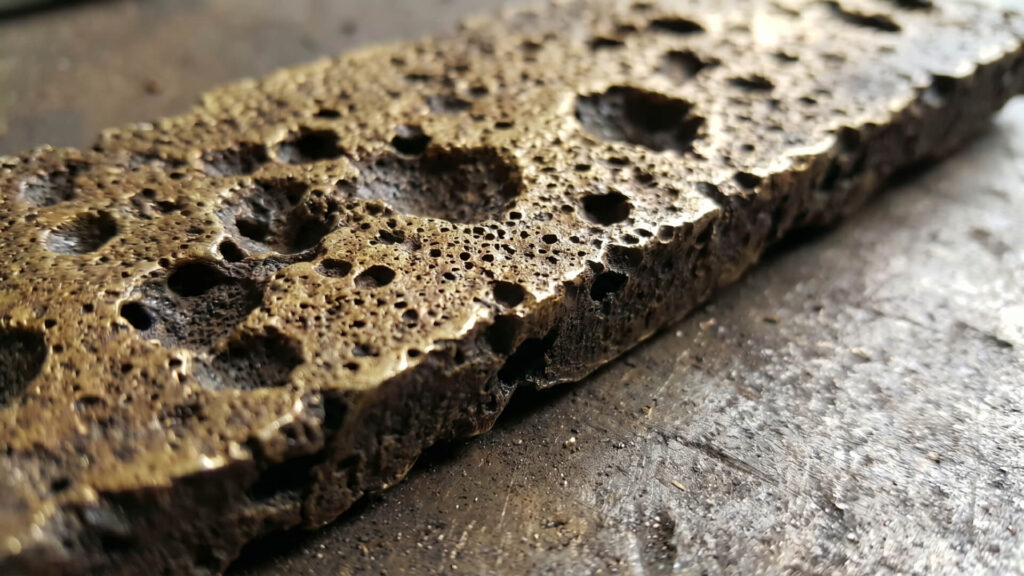
If your finished part looks like Swiss cheese, you overheated the brass.
When you push the temperature way past the liquidus point, the molten metal acts like a sponge. It absorbs gases directly from the air. Worse, you probably started boiling off the zinc. As the metal cools in the mold, those trapped gases desperately try to escape. They freeze inside the brass, leaving tiny bubbles and ugly pits all over your part.
The fix: Turn down the heat. Use a digital pyrometer to track your exact temperature. Get the brass hot enough to pour smoothly, and stop there.
Why is My Melt Slushy or Chunky?
Did your brass look like a glowing slushy when you poured it? Did it freeze halfway through the mold, leaving you with a chunky, incomplete part? You poured it way too cold.
You were likely hovering right on the solidus line. The zinc started to melt, but the copper stayed solid. You never fully liquefied the metal.
Or, you barely hit the exact liquidus point but forgot your superheat. Superheat is a small temperature buffer, usually an extra 50°C to 100°C. You need this extra heat padding so the metal stays liquid while traveling through the cool air and into your mold.
The fix: Leave the crucible in the furnace a little longer. Make sure the metal flows like water before you lift the tongs.
Controlling your heat solves 90% of your shop problems. Now, let’s wrap up everything we’ve learned so you can get to work.
Conclusion
Understanding the melting point of brass is not about memorizing a number. It is about total control.
When you master that 900°C to 940°C (1650°F to 1725°F) sweet spot, your entire process transforms. Your pours come out clean and smooth. You stop boiling off zinc and breathing toxic fumes. You save fuel, and your cutting tools last significantly longer.
Whether you are melting old valves in a backyard foundry or handling precision sheet metal fabrication like our team does here at ShincoFab, the rule remains the exact same. Respecting the metal’s thermal limits is what separates a frustrating pile of scrap from a perfect part.
Sort your scrap carefully. Put on your safety gear. Keep a close eye on your pyrometer, and go melt some brass the right way.