I have spent years working around press brakes and sheet metal fabrication right here on the floor at ShincoFab. I know exactly how hard it is to form large curves without blowing your budget on custom molds, because I’ve seen clients almost walk away from projects when quoted $8,000 just for a custom rolling die.
If you want to prototype curved parts efficiently, you are in the right place. In this guide, I will show you exactly how bump forming works and how it can save you thousands of dollars.
You will learn the best metals to use, the exact production volume where this process makes sense, and how to design parts that actually work. I will also give you three critical questions to ask your fabricator so you do not end up paying for their mistakes.
Here is everything you need to know to get your curved sheet metal parts made right, based on thousands of hours we’ve spent dialing in these exact bends on our own CNC press brakes.
What is Bump Forming?
A standard press brake is great for making sharp corners. But what if your design calls for a wide, continuous cylinder?
That is where bump forming comes in. Some people call it bump bending or step bending. It is a highly effective way to create a large radius in a flat piece of sheet metal.
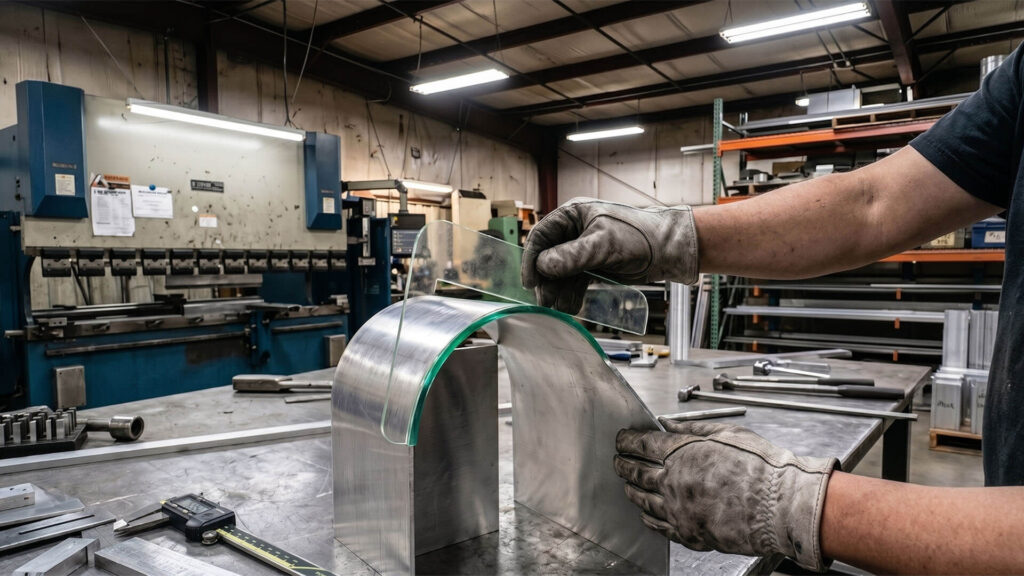
Instead of bending the metal in one massive hit, bump forming breaks the job down. The machine makes dozens of tiny, closely spaced bends. Each hit presses the metal typically 2 to 5 degrees.
When you stack these small hits side-by-side, they form a smooth, large curve.
Bump forming is a sheet metal fabrication process that creates large, sweeping curves by making dozens of tiny, closely spaced bends. This method builds large cones and cylinders using standard CNC press brakes, saving thousands of dollars by eliminating the need for custom hard tooling.
- Builds large curves: It easily turns flat metal into cones, cylinders, or sweeping bends.
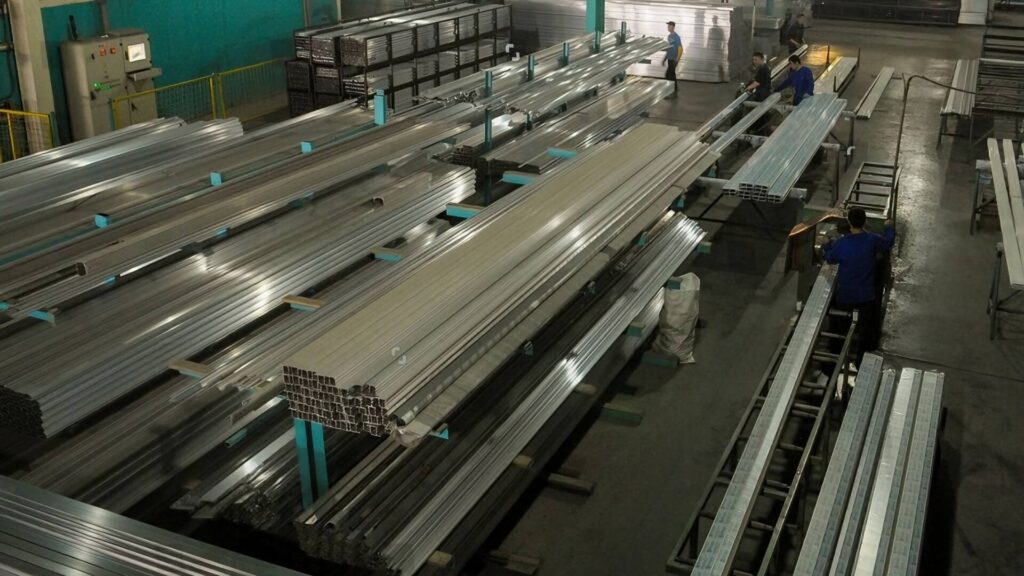
- Uses standard equipment: It relies on a normal CNC press brake (like the Amada and Trumpf machines we run daily) instead of massive, specialized plate rollers.
- Saves you money: You get custom curves without paying thousands of dollars for custom hard tooling.
But getting that curve to look perfectly smooth takes precise math and highly skilled hands. Let me show you exactly how this process actually works on the ShincoFab shop floor.
How Does the Bump Forming Process Actually Work?
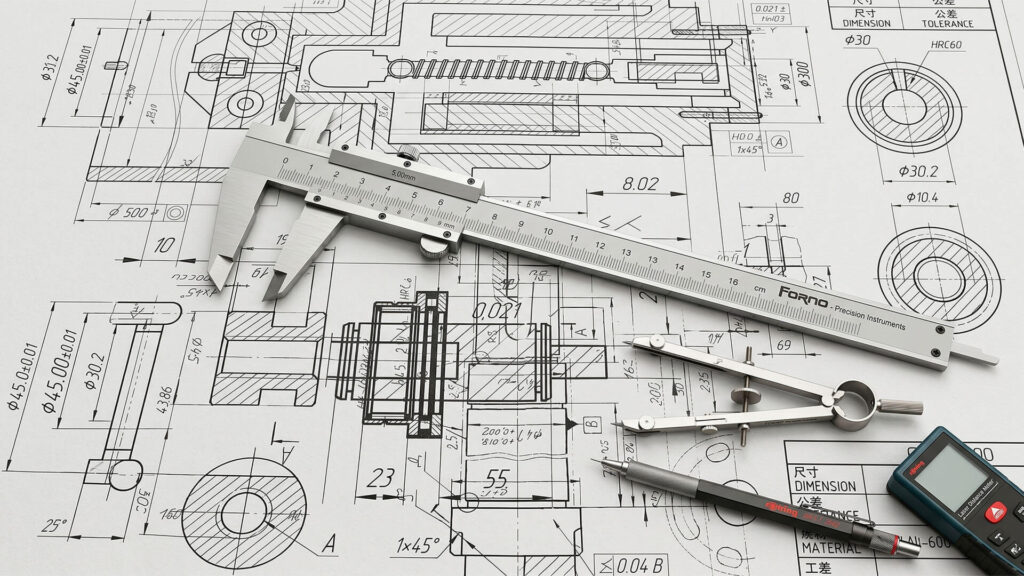
You cannot just guess where to bend the metal. A successful bump-formed part requires careful planning before the machine even turns on. Whenever a new blueprint hits my desk, here are the three steps our engineering team takes to turn a flat sheet into a smooth curve.
Step 1: Doing the Math
Before bending anything on the press brake, engineers must calculate the total arc length of the inside curve and determine the exact radius pitch. The radius pitch dictates the distance between each tiny bend, which ultimately controls how smooth or faceted the final curved metal part will look.
- Arc Length :This is the total length of the curve on the inside of the metal.
- Radius Pitch: This is the exact distance between each tiny bend.
The radius pitch is the secret to a good part. If the pitch is narrow, the distance between hits is small. This gives you a beautifully smooth curve. But more hits take more time. We usually use 3D modeling software like SolidWorks‘ sheet metal module to simulate the bends first. This lets us balance the math to give you the best finish without wasting your money.
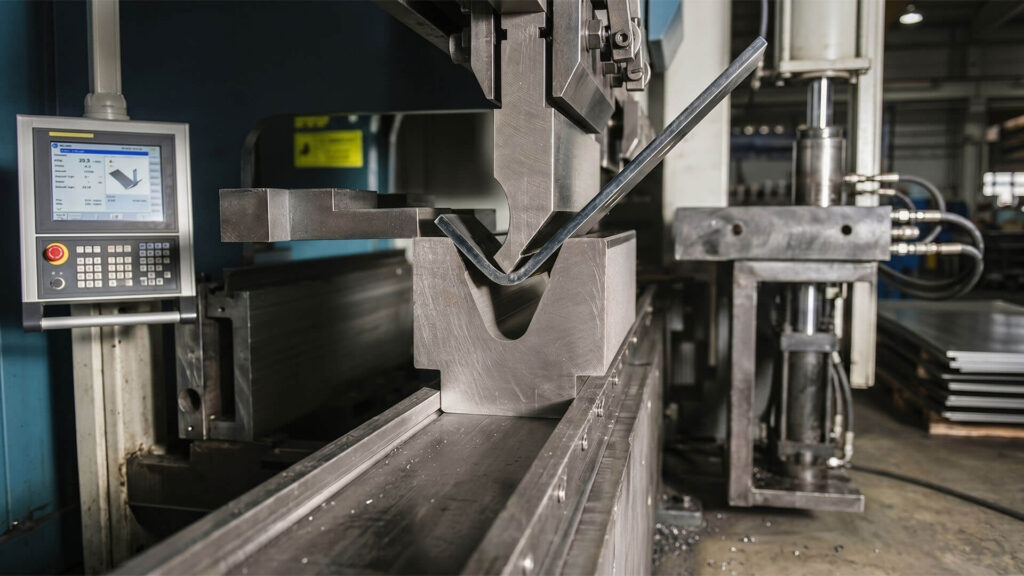
Step 2: Setting Up the Press Brake
Once the mathematical calculations are complete, the press brake operator must carefully set up the machine by selecting a bottom die width that is double the radius pitch and dialing in a very shallow top punch depth.
- Die Width: The opening of the bottom tool needs to be exactly right. It is usually about double your radius pitch. If the die is too wide, the metal sinks too far, and your curve gets choppy.
- Punch Depth: The machine only bends the metal 2 to 5 degrees per hit. The top punch barely presses into the metal, typically descending just 0.010 to 0.030 inches into the die opening.
Getting the depth right often requires trial and error. Our lead operators always test a scrap piece of the exact same material batch first to account for metal springback. For example, a sheet of 304 stainless behaves completely differently under pressure than mild steel.
Step 3: Bending the Metal
Now the physical work begins. The operator slides the flat sheet against a backstop called a backgauge. The machine presses down, making the first tiny bend. The backgauge then pushes the metal forward by a precise increment of 0.050 to 0.125 inches. The machine hits it again.
This repeats dozens of times. Slowly, step by step, the flat sheet curls into a sweeping radius.
The operator stops frequently to check the part against a custom template (we typically laser-cut a quick wooden or acrylic profile gauge right in our shop for this). If they make one small mistake on hit number two, that error multiplies. By hit number forty, the entire part could be ruined.
It takes patience, math, and serious physical skill, but the payoff is huge if you use it correctly.
What Are the Biggest Benefits of Bump Forming?
Why do so many engineers and designers rely on bump forming? Because it solves two massive problems: time and money.
The biggest benefits of bump forming are the complete elimination of expensive upfront tooling costs, significantly faster turnaround times for prototypes, and total design flexibility. By utilizing standard press brake equipment, fabricators can create custom curves and easily modify designs without requiring new permanent molds.
- Zero Upfront Tooling Costs: Custom molds cost thousands of dollars. Bump forming uses standard tools your fabricator already owns. You keep that money in your pocket.
- Faster Turnaround Times: Waiting for a custom mold can delay your project by a month or more. With bump forming, the shop can start immediately. You get your parts in days, not weeks.
- Total Design Flexibility: You are not locked into one specific shape. Do you need to change your design from a cylinder to a cone? Or tweak the curve radius? The operator just changes the math in the machine. No new molds are required.
What Are the Disadvantages of Bump Forming?
I’ve had clients walk into our factory thinking bump forming is a magic fix for everything. It is not. It comes with a few hidden headaches.
The main disadvantages of bump forming include the requirement for highly elite operator skills, time-consuming mathematical and template setups, and unavoidable material scrap. The manual trial-and-error nature of dialing in the exact punch depth means you must always account for sacrificed test parts before finalizing production.
- Elite operator skills: This is the hardest job you can do on a press brake. It takes an operator five to ten years to truly master it. If you use a cut-rate shop with junior operators, you will see terrible, faceted curves that resemble a stop sign.
- Time-consuming setup: The actual bending is fast. But the engineering upfront is slow. Your fabricator has to do complex math and cut custom templates just to check the curves.
- Material scrap: Getting the punch depth exactly right requires trial and error. We always tell our clients to account for 1 or 2 sacrificed test parts to dial in the machine before making your final pieces.
Because of these downsides, bump forming is not always the best choice for every project. Sometimes, spending the money on a permanent mold makes more sense. Let’s compare bump forming directly against hard tooling so you can make the right call.
Bump Forming vs. Hard Tooling: Which Should You Pick?
You have two ways to make curved metal parts: bump forming or hard tooling. How do you choose? It all comes down to your production volume.
Hard tooling uses a custom-made mold to stamp your curve in a single, heavy hit.
When choosing between metal forming methods, select hard tooling if you are mass-producing thousands of identical parts and require tight tolerances. Conversely, choose bump forming if you are building prototypes or running small batches, as it avoids massive tooling costs and delivers parts in days.
- Hard tooling: Choose this if you are mass-producing thousands of parts. It delivers highly accurate, identical pieces with tight tolerances. However, the custom mold can cost thousands of dollars and take four weeks to build.
- Bump forming: Choose this if you are building prototypes or running small batches. You avoid the massive upfront tooling cost entirely. Plus, you get your parts in days, not months.
In short, hard tooling is for scale. Bump forming is for speed and flexibility.
What Is the Break-Even Point for Bump Forming?
How do you know when to stop bump forming? It comes down to basic math.
Bump forming has zero tooling costs, but the manual labor is expensive. A skilled operator has to carefully monitor every single bend.
The financial break-even point for bump forming typically occurs between 100 and 200 parts. For production runs under 100 parts, the manual labor remains cheaper than tooling. However, once production exceeds 200 parts, investing in permanent hard tooling or specialized plate rolling becomes more cost-effective.
- Under 100 parts: Stick with bump forming. The high labor cost is still much cheaper than buying a $5,000 custom mold.
- Over 200 parts: It is time to ditch bump forming. Pay for the hard tooling or run the job on a specialized plate roll. At this volume, the slow manual labor will cost you more than the tooling.
Always compare the upfront tooling price against the total hourly labor.
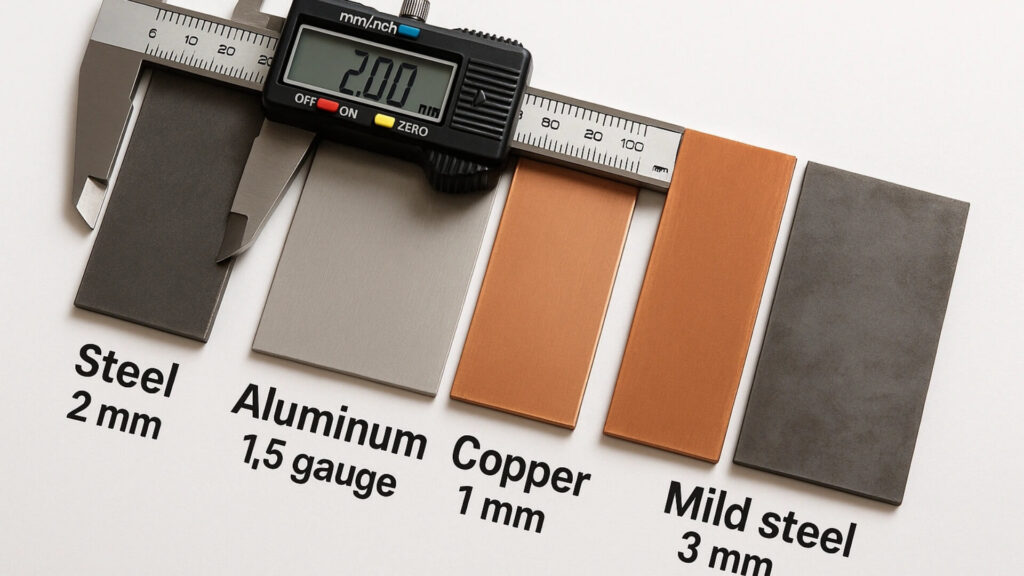
What Are the Best Metals for Bump Forming?
Not all metals survive this process. Bump forming puts a lot of stress on the sheet. Over the years, we’ve learned the hard way which metals behave on the press brake and which ones fight back.
Top Metal Choices
The best metals for bump forming are highly ductile materials that can stretch and withstand repeated press brake hits without fracturing. Top choices include mild steel for its forgiveness, 304 stainless steel for durability, and standard aluminum alloys like 5052 for lightweight formability.
- Mild Steel: This is the absolute best choice. It is forgiving and takes multiple bends smoothly.
- Stainless Steel: Tough and durable. It requires more pressure from the machine, but it holds a curve beautifully. Just keep in mind the springback is aggressive.
- Standard Aluminum Alloys (like 5052): Most grades are lightweight and highly formable. Just make sure you verify the exact grade with your shop.
Materials to Avoid
The worst materials for bump forming are brittle or structurally compromised metals that easily snap under repeated stress. You should completely avoid tempered metals like 6061-T6 aluminum, which micro-cracks under pressure, and perforated sheets, which bend unpredictably due to weak structural spots.
- 6061-T6 Aluminum: Avoid this at all costs. It is a tempered, brittle metal. We’ve seen it literally snap or micro-crack on the press brake under the stress of repeated hits.
- Perforated Sheets: Metal full of random holes bends unpredictably. The cutouts create weak spots, leaving you with an uneven, messy curve that looks terrible no matter how good the operator is.
How Do You Design Better Bump-Formed Parts?
A bad design guarantees a bad part. You want to make the operator’s job as easy as possible.
To design better bump-formed parts, engineers should keep geometric shapes simple, avoid extremely tight bend radii, loosen dimensional tolerances, and keep the metal under 24 inches wide. Designing with these manufacturing limits in mind ensures a smoother process and reduces the risk of part failure.
- Simple shapes: Aim for clean, continuous curves. Complex, jagged geometries drastically increase setup time and the risk of mistakes.
- Bend radii: Do not force an extremely tight radius. Pushing the metal into a tight curve creates harsh ridges and weakens the part.
- Dimensional tolerances: This is a highly manual process. It relies on human skill and trial and error. Give the shop a little breathing room in your dimensions (e.g., allowing ±0.030 to ±0.060 inches rather than a strict ±0.010), especially on long bends.
- Maximum width (24 inches): As the metal gets wider, keeping the bend angle perfectly straight becomes incredibly difficult. If your part must be longer than 24 inches, talk to your fabricator early to see if their equipment can handle it.
Even with a flawless design, bump forming leaves behind a distinct footprint. Because the curve is actually made of dozens of tiny flat bends, you will see faint lines on the metal.
But what if you are building a consumer product that needs to look flawless? Let’s look at how to hide those marks.
How Do You Hide Bend Lines After Bump Forming?
Bump forming does not create a mathematically perfect curve. It creates a series of tiny flat spots.
If you look closely, you will see faint bend lines. This is fine for a hidden bracket inside a machine. But it is a big problem if the part sits right in front of your customer.
To hide the faint bend lines created by bump forming, fabricators use cosmetic finishing techniques after the metal leaves the press brake. The best methods include manually grinding and sanding the ridges, applying a skim coat of body filler, or using a thick, textured powder coat.
- Grind and sand: A skilled worker can manually sand the ridges down using a dual-action sander. It takes extra time, but it works perfectly for bare metal parts.
- Body filler: If you plan to paint the metal, a quick skim coat of body filler will easily level out the tiny dips.
- Powder coating: A heavy, 3-to-5 mil textured powder coat is fantastic at hiding minor surface flaws. It fills in the bend lines without needing any manual sanding.
What Is Bump Forming Used For in the Real World?
You might think bump forming is only for basic, low-level metal brackets. It is not. Major industries rely on this exact process every single day.
Bump forming is widely used across major industries to manufacture large, curved sheet metal parts without expensive tooling. Common real-world applications include aerospace nose cones and fuselage panels, automotive curved fenders and custom fuel tanks, and precision medical instruments or assistive devices.
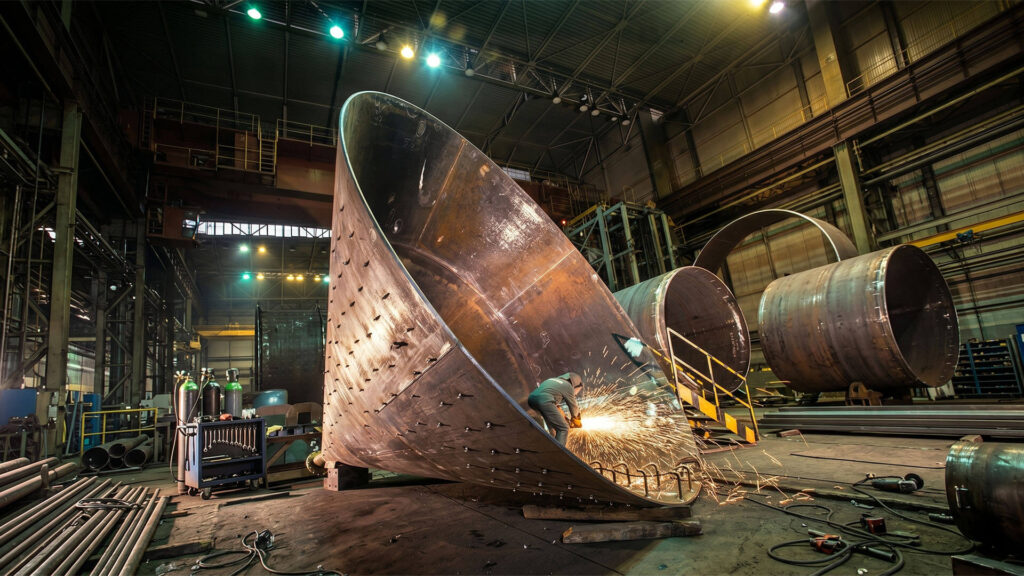
- Aerospace: Engineers use it to build lightweight nose cones and sweeping fuselage panels.
- Automotive: Shops rely on it for curved fenders, oil pans, and custom fuel tanks.
- Medical: Designers use it to prototype precision medical instruments and assistive devices.
This process clearly works for high-stakes projects. But remember, your final part is only as good as the shop making it.
What Questions Should You Ask Your Fabricator Before You Start?
Bump forming is an art. You cannot trust your project to a rookie. When clients audit our ShincoFab facility, I always respect the engineers who ask the hard questions.
Before starting a bump forming project, you must ask your fabricator three critical questions to verify their expertise. Ensure they know how to handle material springback, verify that they use custom physical templates to check curves, and confirm their press brake utilizes crowning compensation.
- Material springback: Ask how they handle material springback. Metal naturally bounces back after a bend. A smart shop will always run a scrap piece first to calculate the exact pressure needed to overcome this bounce.
- Custom templates: Ask if they use custom templates. Bumping is a highly manual process. The operator should be checking your part against a physical template (like the laser-cut ones we use) after every few hits to ensure the curve stays perfectly on track.
- Crowning compensation: Ask if their press brake uses crowning compensation. Large press brakes actually bow in the middle under heavy pressure. Crowning compensation actively pushes back, keeping the machine perfectly flat so your parts do not warp. If they don’t know what crowning is, walk away.
If they answer these questions confidently, you are in good hands.
Conclusion
Bump forming is not magic. It is just a smart, cost-effective way to get large curved parts without paying for expensive custom molds.
If you are building prototypes or running small batches, it is easily your best option. You just need a solid design, the right metal, and an experienced operator.
At our sheet metal fabrication shop, ShincoFab, we see firsthand how this process saves clients time and money every single day. The precise math and physical skill really do pay off on the shop floor.
Keep your production volume in check. Simplify your curves. Ask your fabricator the hard questions before you begin. If you follow these steps, your next curved metal project will be a massive success.