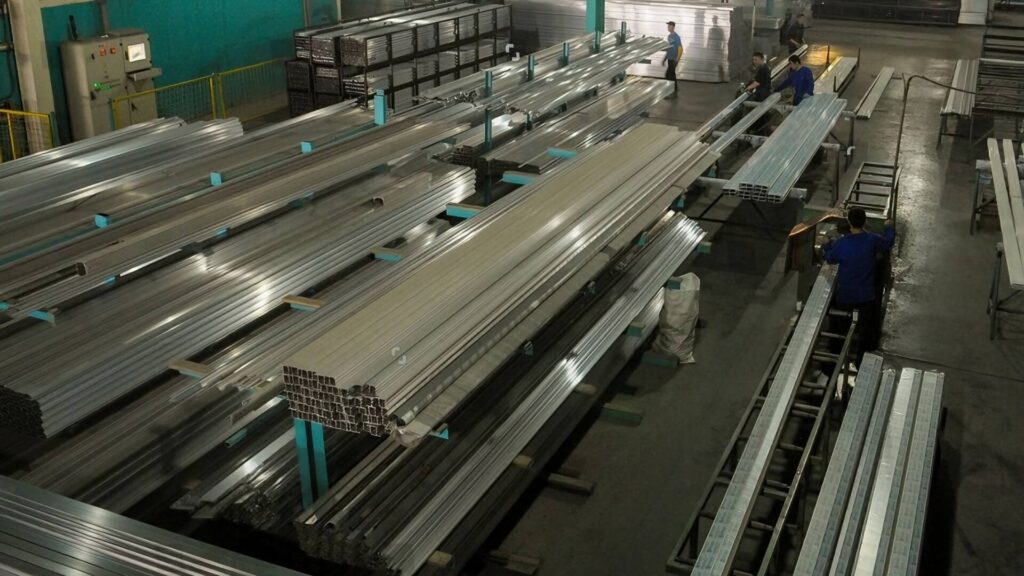
I don’t just build weekend DIY projects; I spend every day on the factory floor at ShincoFab. Over the years of fabricating precision sheet metal, I’ve seen firsthand how a single wrong screw choice can halt an entire assembly line or ruin a machined enclosure. I know exactly what it feels like when a cheap screw strips under a high-torque industrial driver, costing us both time and raw materials.
This guide explains the difference between screw head shapes and drive types, how to match fasteners to specific metal gauges, how to spot cheap hardware before you buy it, and how to extract stripped screws without damaging your workpiece.
Why Do Screw Heads Matter?
I know it is tempting to grab whatever leftover screws are sitting at the bottom of your toolbox. But trust me, the top of that screw is more important than you think. The head is the only way your tool connects to the fastener. If that connection is weak, your project will suffer.
The difference between a stripped screw and a perfect hold
Have you ever tried to drive a screw into a tough piece of aluminum or steel, only to hear a loud, metallic grinding sound? That is the sound of a stripped screw. It happens when your driver bit slips and tears up the metal on the screw head.
The right screw head prevents this. It locks your tool tightly in place. Instead of slipping, all your pushing power goes straight into driving the threads. You get a tight, hold every time, which is critical when dealing with vibration in metal casings.
How the right head saves you time and frustration
Nothing bottlenecks a production line or a complex build faster than fighting with your hardware. If you pick the wrong screw head for the job, you will spend half your day trying to dig out stuck, ruined screws from expensive metal parts.
Choosing the correct screw head gives you three massive benefits:
- Faster work: Your tool stays in the groove, allowing you to drive screws in seconds.
- Less damage: Your drill won’t accidentally slip off the screw and scratch your expensive wood or metal.
- Zero headaches: You avoid the nightmare of using pliers to extract a shredded screw.
So, how do you avoid this mess and pick the right one? It all starts by understanding the two main buckets of screw heads. Let’s look at how they sit on your material.
The Two Main Buckets: Countersunk vs. Non-Countersunk
Let’s keep this simple. Every screw falls into one of two buckets. It either sinks perfectly into your material, or it sits right on top of it. Knowing the difference makes or breaks how professional your final product looks.
Countersunk Heads
Have you ever run your hand over a high-end electronics enclosure we’ve manufactured and felt zero bumps? That is the magic of a properly countersunk screw.
The bottom of this screw head is shaped like a cone. To use these in sheet metal, we often pre-punch or dimple the metal to create a perfect conical nesting spot. As you drive it in, the top becomes perfectly flush with the surface.
Here is why you want them:
- No snags: You won’t catch clothing or scratch hands on the final product.
- Seamless finish: They sit totally flat, allowing moving parts to slide over them without interference.
- Pro appearance: They give your custom fabrication work a sleek, machined look.
Non-Countersunk Heads
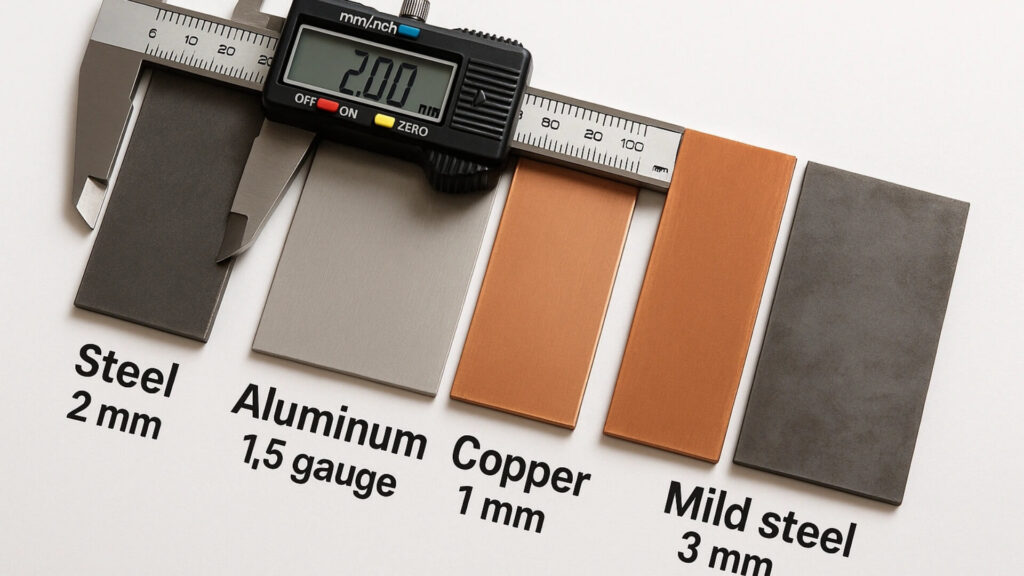
Sometimes, you do not want the screw to sink. This is especially true when working with standard gauges of sheet metal (typically 18-gauge to 22-gauge) where dimpling is not an option. That is exactly where non-countersunk heads come in.
The bottom of these heads is flat. When you drive them in, they stop right at the surface, and the head stays totally exposed.
This is actually a good thing for a few reasons:
- Better grip: They cover more surface area, clamping your metal parts tightly together.
- Protects thin materials: If you are fastening thin sheet metal (under 0.040 inches thick), a countersunk cone shape would tear right through the material under stress. A flat bottom prevents this.
- Heavy-duty strength: They hold up much better when you are assembling heavy brackets or machinery that face extreme vibration.
The 5 Most Common Screw Head Shapes You’ll Actually Use
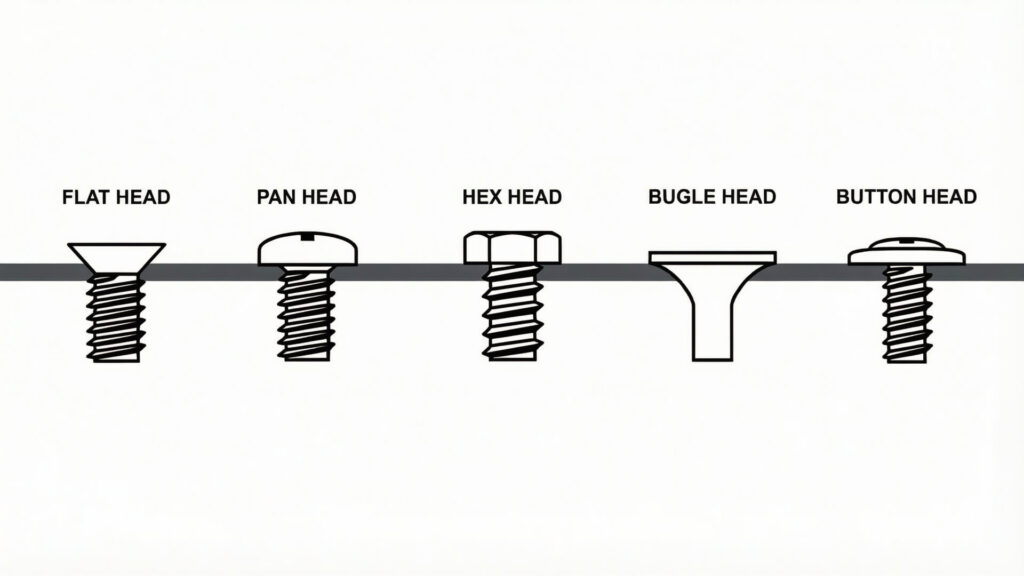
There are nearly 40 different types of screw heads out there. If you are doing metal fabrication or robust repairs, you only need to know these five.
Flat Head
The flat head is a standard countersunk screw, meaning it sinks down perfectly into a pre-countersunk hole.
Here is why it’s essential:
- Flush finish: It sits completely flat against your metal panels.
- Aerodynamic/Sleek: Perfect for outer casings where a smooth profile is required.
Pan Head
If you walk down our assembly line, you will see pan head screws everywhere. It is a non-countersunk screw with a flat bottom and a slightly rounded top.
Why it is so popular:
- Versatile: It works exceptionally well for fastening metal to metal or mounting components inside enclosures.
- Strong grip: The flat bottom clamps hard without crushing or distorting the sheet metal.
- Clean look: It sits slightly above the surface but maintains a neat, industrial aesthetic.
Hex Head
When you need serious structural strength, grab a hex head. This screw has a six-sided top that you turn with a wrench or a socket instead of a standard bit.
Why you need it for big jobs:
- Zero stripping: A socket grips the outside of the head, so it almost never strips under high torque.
- Massive power: You can crank these down hard for assembling heavy frames or structural metal brackets.
- Tight spaces: You can tighten them from the side with a wrench if a bulky impact driver cannot fit above the screw.
Bugle Head
(Note from the shop floor: While we don’t use these on our metal assembly lines, you will need them when mounting our custom metal work to walls).
Bugle heads are primarily designed for drywall. If a screw goes too deep, it ruins the wall board.
How it works:
- Curved shape: It has a smooth, curved bottom instead of a sharp angle.
- No tearing: It presses perfectly into drywall without ripping the fragile paper cover, which is crucial if you are installing our heavy metal vents or panels onto a wall.
Button & Truss Heads
In sheet metal fabrication, Button and Truss heads are our absolute lifesavers when fastening extremely thin 20-gauge to 24-gauge of aluminum or stainless steel.
Why they are great to have:
- Pro appearance: Button heads offer a smooth, low-profile dome that looks great on exposed consumer products.
- Extra wide: Truss heads are wider than normal screws, acting almost like a built-in washer to spread the clamping force.
- Stops cracking: That extra width stops thin sheet metal from tearing, snapping, or fatigue-cracking under vibration.
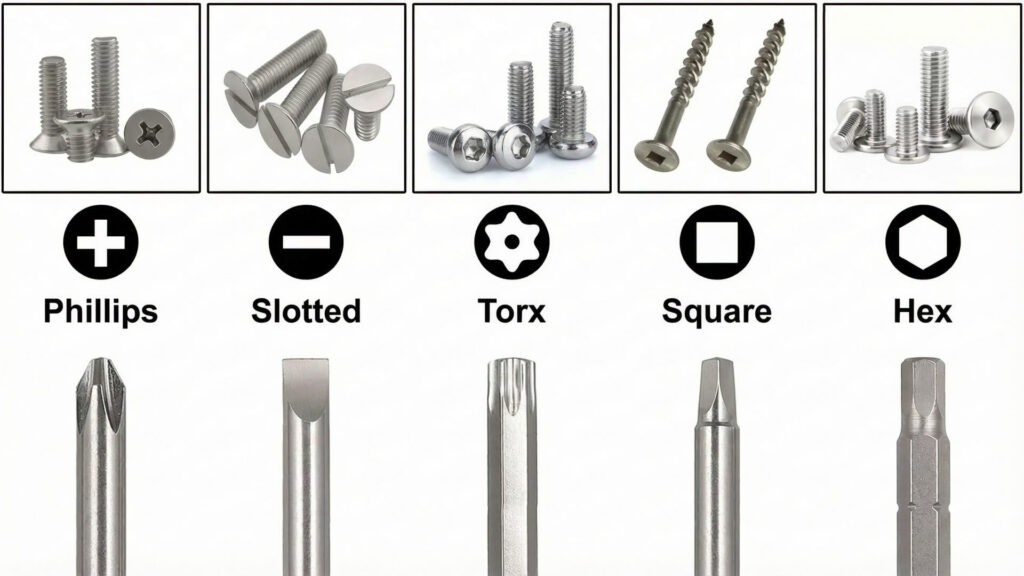
Head Shape vs. Drive Type: What’s the Difference?
People mix these two things up all the time. Let me clear it up.
The head shape is the outside profile of the screw (flush or sticking up). The drive type is the hole carved into the top. It decides what tool you actually use to turn the screw. Let’s look at the four drive types you will see the most.
Phillips & Slotted (The old classics)
Slotted screws have a single straight line. Phillips screws have a cross shape.
Why they are used:
- Universal: Everyone has the right tool for these.
- Light duty: They are fine for basic, low-torque assembly (typically under 50 inch-pounds).
Just be careful: If you push a Phillips screw too hard with a pneumatic or impact driver, the bit will violently pop right out. In mechanical engineering, this is called “cam-out“, and it will strip your screw in seconds.
Torx / Star
This drive looks exactly like a six-pointed star. If you are doing serious metal assembly, this is your best friend.
Why it is amazing:
- Zero slipping: The star shape grips your driver bit like glue.
- High speed: You can drive these fast on a production line without ruining the head.
- Consistent torque: It transfers torque perfectly, reducing operator fatigue.
Square / Robertson
As the name says, this is just a square hole. But do not let the simple design fool you.
Why manufacturers love it:
- One-handed driving: The screw sticks to your driver bit so tightly, you rarely need to hold it with your free hand—perfect for fast-paced assembly.
- Straight driving: The deep square fit prevents the screw from wobbling side-to-side.
Hex / Allen
This is a six-sided hole carved into the head. You turn it with an Allen wrench or a hex bit. (Do not confuse this with a Hex Head screw, which has the six sides on the outside!)
Why it is so common:
- Tight clearances: An L-shaped Allen wrench can reach into tiny corners of custom enclosures where a power drill cannot fit.
- Clean finish: You see them all the time on high-end machined parts because they offer a flush, precise look.
How to Choose the Right Screw Head for Your Project
Picking the right screw is not a guessing game. You do not need to stand in the hardware store aisle feeling overwhelmed. You just need to ask yourself three simple questions.
To make things even easier, our assembly technicians at ShincoFab put together this quick cheat sheet for matching materials with the perfect hardware:
ShincoFab’s Quick Screw Selection Cheat Sheet
| Application / Material | Best Head Shape | Best Drive Type | 🏭 ShincoFab Pro Tip (Why we use it) |
|---|---|---|---|
| Thin Sheet Metal | Pan or Truss | Torx or Square | The broad bearing surface helps spread the load so the screw is less likely to pull through thin sheet. Truss heads also act like built‑in washers to resist vibration and cracking. |
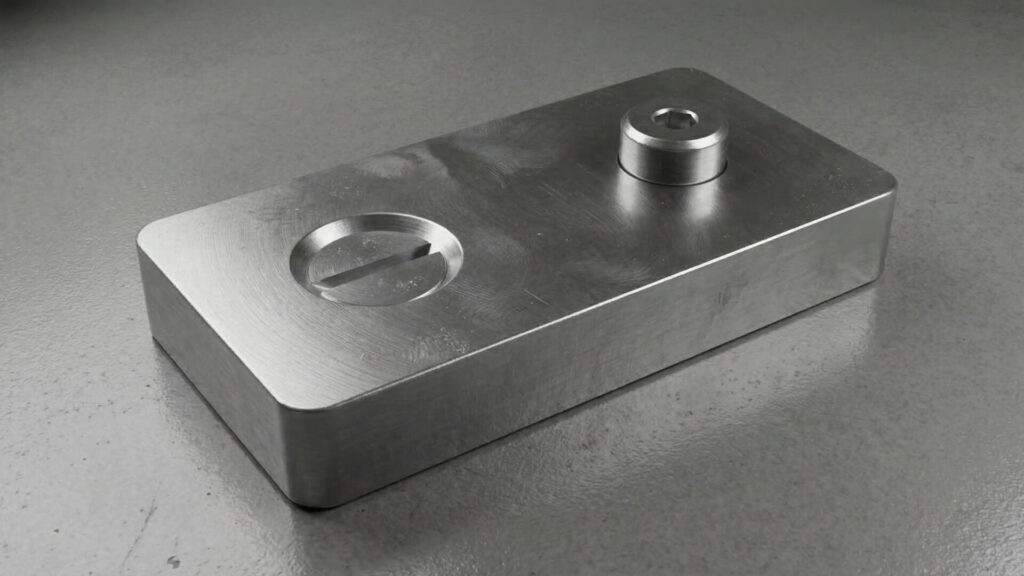
| Thick / Machined Metal | Flat (Countersunk) | Hex (Allen) or Torx | Great when you want the top of the screw to sit fully flush for a smooth, aerodynamic, or sliding surface. Just remember: you must countersink the hole (cut a matching cone) before installing the screw. |
| Heavy Structural Brackets | Hex Head | External Hex | Lets you apply high torque with a wrench or socket. The large external hex is much less likely to round off than smaller internal drives when tightening heavy machinery frames. |
| Consumer‑Facing Enclosures | Button Head | Hex (Allen) | It creates a clean, low-profile dome with no sharp corners to snag your hands or clothes. You get a smooth, finished look that still leaves plenty of room for your tools. |
Match your material (Thin Sheet Metal vs. Structural)
First, what are you actually fastening? Your material dictates your screw head.
If you are dealing with thick, machined aluminum (like 1/4″ or 3/8″ plate) that can be countersunk, use a flat head. But if you try to drive a countersunk flat head into standard, un-dimpled thin sheet metal, it will bend and crush the metal. For thin metal, you need a flat-bottomed pan head or truss head to clamp it down tight without distortion.
Think about the final look (Hidden vs. Visible)
Next, ask yourself if you want people to see the hardware.
If you are building a sleek consumer electronics casing, you want a flush finish. Use a countersunk flat head. But what if you are assembling an industrial-style control box? Grab a sleek button head or a rugged hex bolt. They sit right on top of the metal and give your project a purposeful, mechanical look.
Consider safety (Smooth edges to avoid snags)
Finally, think about where the screw is going. Will machine operators or moving parts brush past it?
If you use a chunky hex head on a tight access panel, someone will scrape their knuckles every time they reach inside for maintenance. For areas people touch constantly, always choose a head that sits totally flush. If the screw absolutely has to stick out, use a smooth, rounded button head. No sharp edges means no painful scratches.
How to Spot Cheap Screw Heads Before You Buy
At our factory, we go through thousands of fasteners a week. We’ve learned the hard way that cheap metal hides easily. Many budget screws look shiny and tough inside the box, but in reality, they strip instantly under an industrial impact driver.
Here is a trick from our quality control team to spot cheap fasteners before you waste your money:
- Read the grade: Look for specifically graded “hardened steel” or certified Stainless Steel 304/316 . If the package just says “zinc-plated” but does not mention the steel grade, it might be a soft alloy.
- Feel the weight: Soft, cheap metals feel incredibly light. If a handful of screws feels like cheap plastic coins, they will shear off under stress.
- Check the price tag: Do not cheap out on the hardware that holds your hard-machined parts together. A few extra dollars on strong metal saves hours of drilling out broken screws.
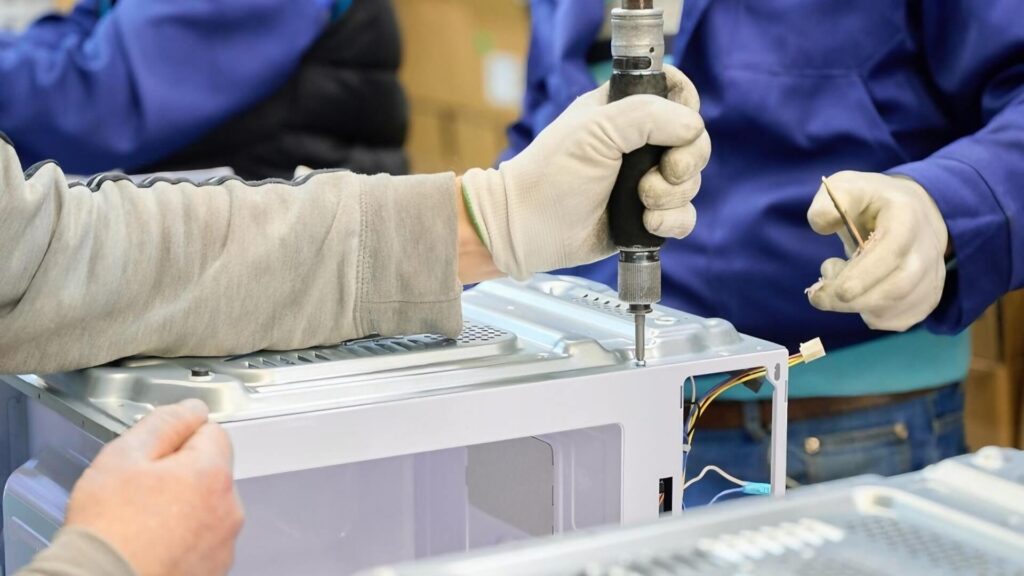
How to Match Your Drill Settings to the Screw Head
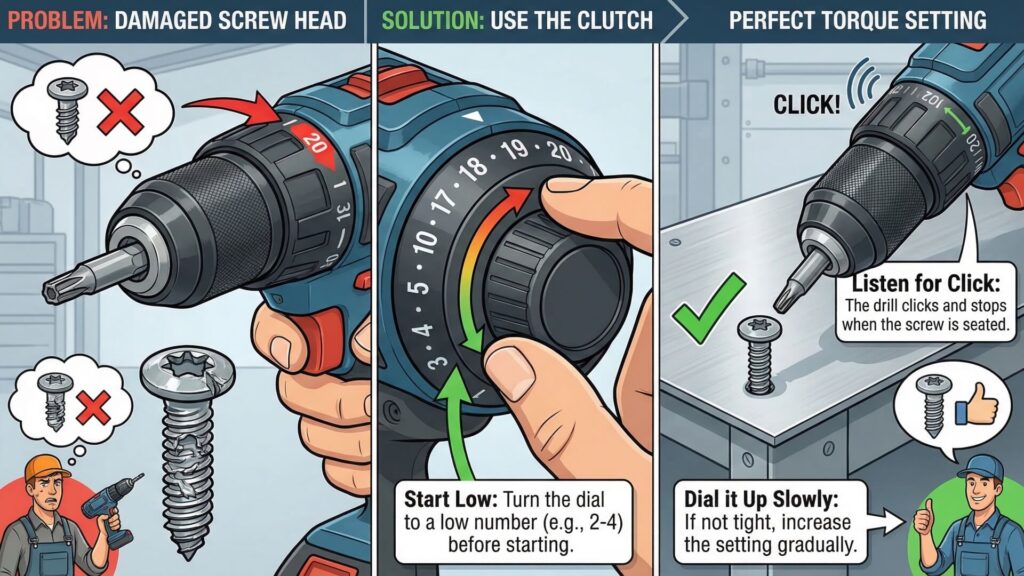
You bought the perfect, high-quality Torx pan head. But the second you pulled the drill trigger, you completely obliterated the top of it. Why?
Do not blame the screw just yet. Blame your tool settings.
Industrial impact drivers and power drills are strong. If you leave your tool on maximum torque, it will tear right through the metal on your fastener or strip the threads in your sheet metal hole. To fix this, you need to use your drill’s clutch.
Here is how to set it so your screws actually survive:
- Start low: Turn the clutch dial down to a low number (usually between setting 2 and 4 on a standard 18V drill) before you drive your first screw.
- Listen for the click: When the screw seats tightly against the metal, the drill will make a loud clicking sound and stop spinning. This protects your screw head from camming out!
- Dial it up slowly: If the screw is not clamped down enough yet, turn the dial up a few clicks and try again until you find the perfect torque setting for that specific metal gauge.
How to Remove a Stripped Screw Head
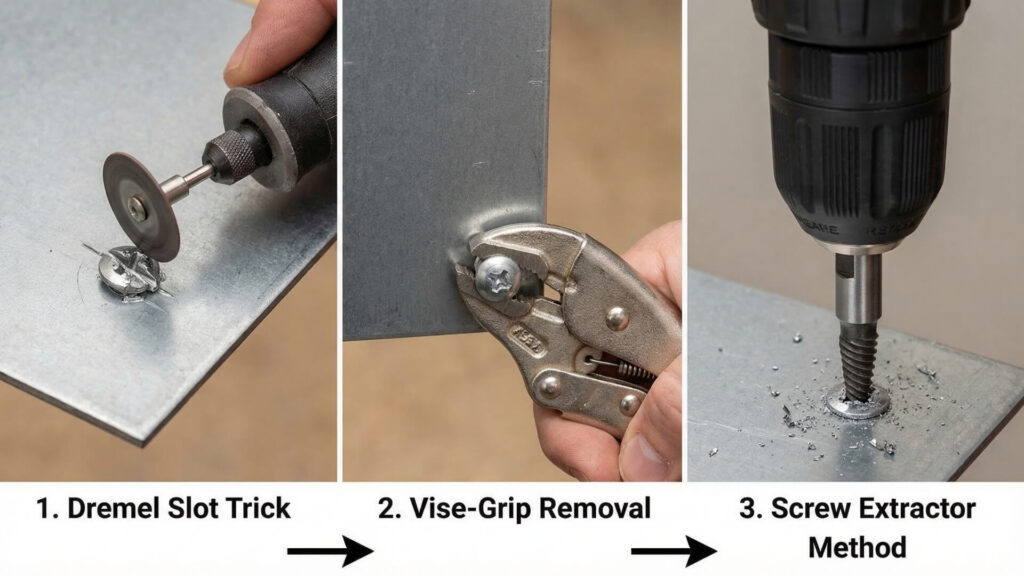
Other guides love to talk about how Torx or Square drives prevent stripping. But that does not help you right now. You already have a mangled piece of metal stuck in your workpiece.
When a screw strips on our assembly line, we don’t have time to play with “kitchen rubber bands” (a common internet myth). We need it out now without damaging the customer’s sheet metal. Here is what our technicians actually do:
The Dremel / Cut-off Tool Trick
If a flat-bottomed pan head is stuck, we take a rotary tool with a thin cutting wheel and carefully slice a straight line directly across the ruined head. This instantly turns a stripped Phillips or Torx into a slotted screw. We then grab a heavy-duty flathead screwdriver and back it out.
Grab the Vise-Grips (Locking Pliers)
Did you use a pan head or button head screw? If the head is sticking up above the metal surface, you are in luck. Grab a pair of locking pliers (Vise-Grips). Clamp them tightly onto the outside diameter of the screw head and physically twist it out by hand.
Use a Screw Extractor
If the screw is flush and destroyed, you need a screw extractor. It is a special bit with reverse threads. You drill a tiny hole into the broken head, flip the bit around, and run your drill in reverse. It bites into the metal and pulls the stubborn screw right out.
(Pro tip: Control your depth so you don’t drill completely through and damage the components behind the metal panel!)
Conclusion
Picking the right screw head does not have to be a guessing game. You now know the exact shapes to look for, the best drive types to use for high-torque applications, and how to stop destroying your hardware.
Getting these small details right makes all the difference. At ShincoFab, we see this firsthand every single day. As a sheet metal fabrication factory, we know that choosing the correct fastener is exactly what turns a fragile assembly into a durable, professional-grade product.
You finally have the knowledge. You know what to avoid and how to set your tools up for success. Now, grab your driver and go build something you can be proud of.