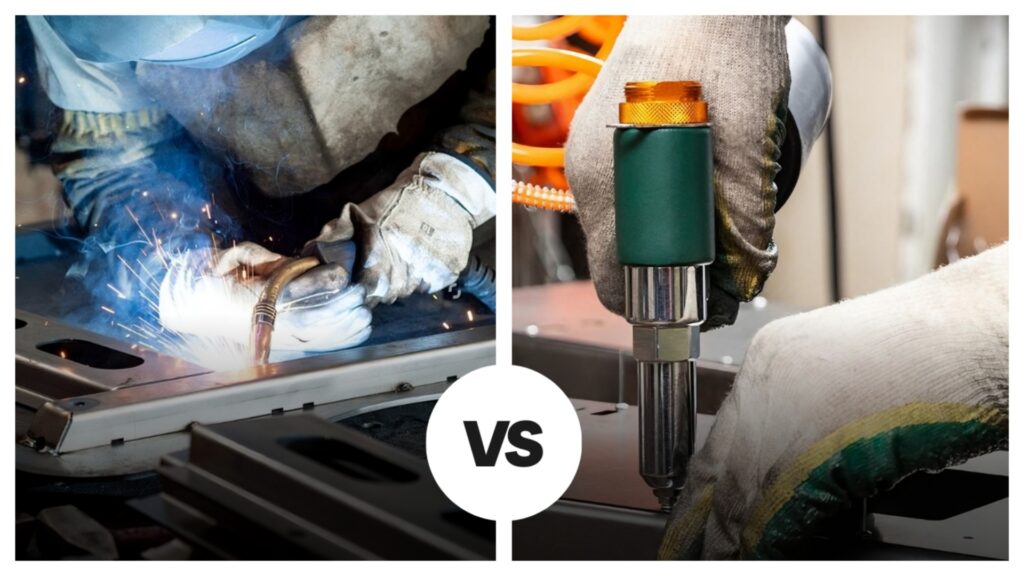
You have two pieces of metal. You need them to stay stuck together.
Now you have a choice to make: melt them together (welding) or pin them together (riveting).
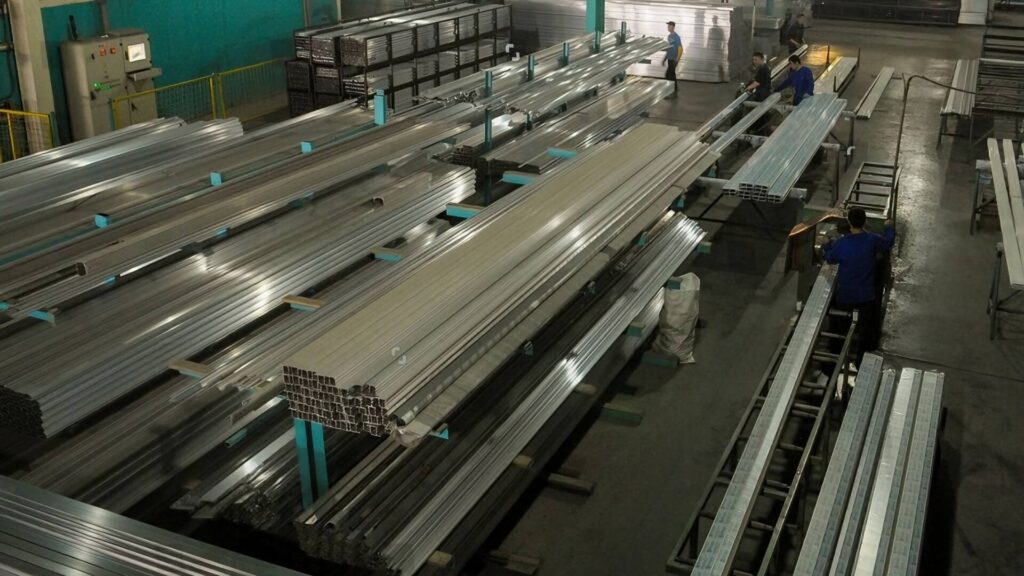
I’ve spent years in the shop fabricating everything from heavy steel frames to delicate aluminum panels. I know from experience that picking the wrong method can ruin your material and waste your money.
We aren’t building a spaceship today. We are looking at what works best for your specific DIY projects, your budget, and your current skill level.
In this guide, I’ll explain exactly how each method works and the pros and cons of each. You will walk away with a simple, no-nonsense checklist to help you pick the right tool for the job.
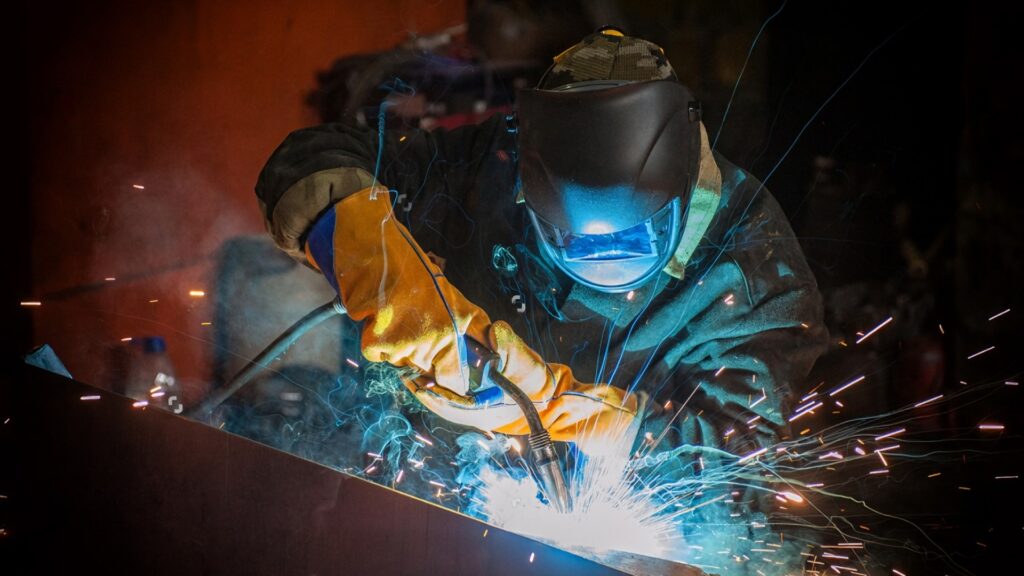
What is Welding? (The “Hot” Method)
Think of welding as the ultimate permanent bond. You aren’t just gluing two pieces of metal together. You are actually melting them so they become one solid piece.
If glue is a handshake, welding is a blood pact.
How it Works
The process is intense. You typically use high heat generated by electricity or gas to melt the edges of your metal parts.
As the metal turns to liquid, you usually add a “filler” material—like a wire or a rod—into the puddle. This helps bridge the gap.
When the heat stops, everything cools down and solidifies together. Once that happens, it is permanent. You can’t just unscrew a weld later.
The Big Benefits
Why go through all that trouble with heat and electricity? Here is why welding is the king of the shop:
- Strength: It is practically unbreakable. In many cases, the welded joint is actually stronger than the original metal around it.
- Looks: You can grind a weld down flat. When you paint over it, it disappears. It looks like one smooth, continuous piece of steel.
- Sealing: Since it fuses the seam shut, nothing gets through. It is watertight and airtight. That is why you weld a gas tank instead of bolting it.
Welding is powerful, but it involves a lot of heat and expensive gear. Sometimes, you don’t want to melt your project. Let’s look at the cooler alternative.
What is Riveting? (The “Cold” Method)
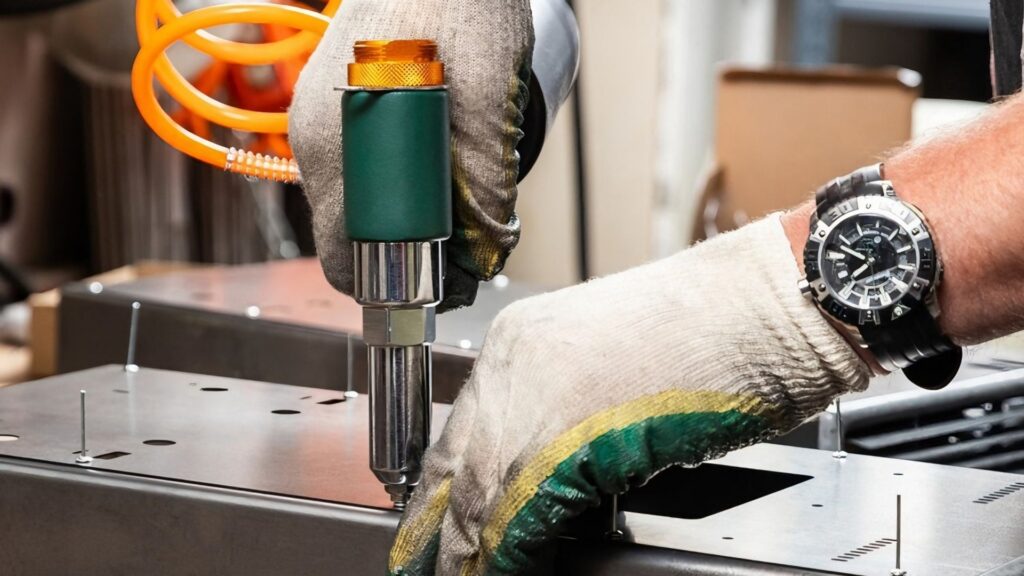
Riveting is a mechanical way to join parts. It doesn’t rely on chemistry or heat. Think of a rivet like a really strong, permanent screw that you don’t need a screwdriver for.
It holds things together by force, not fusion.
How it Works
The process is much simpler than welding. It happens in three steps:
- Drill: You line up your two pieces of metal and drill a hole right through both of them.
- Insert: You push the rivet pin through that hole.
- Clamp: You use a tool (like a rivet gun) to pull the pin or squash the back end.
This action mushrooms the tail of the rivet against the back of the metal. It clamps the sheets together tightly, locking them in place.
The Big Benefits
Riveting might seem old-school, but it has some massive advantages for the home DIYer:
- No Heat: Since there is no fire involved, you won’t warp or melt your project. Your nice flat sheet metal stays flat.
- Mix and Match: This is riveting’s superpower. You can join aluminum to steel, or even distinct materials like metal to plastic. Welding generally requires the metals to be the same type.
- Easy to Learn: The learning curve is almost flat. If you are capable of using a power drill, you can install a rivet.
So, one method uses extreme heat, and the other uses mechanical force. But which one is actually better for your specific project? Let’s put them in the ring together.
💡 From the Factory Floor:
We frequently produce enclosures for industrial electronics where heat sensitivity is a major issue. One client needed to attach a delicate pre-painted aluminum heat sink to a galvanized steel chassis. Welding was impossible—it would have successfully bonded the metals but destroyed the expensive paint finish and warped the heat sink fins. We used blind rivets instead. This allowed us to join the dissimilar metals instantly without any heat damage, preserving the finish and saving the client hours of post-production masking and repainting.
The Showdown: Comparing the Two
Now that we know how they work, let’s pit them against each other to see which one fits your needs. Here is a quick snapshot of how they stack up:
| Feature | Welding | Riveting |
|---|---|---|
| Bond Method | Fusion (Melts together) | Mechanical (Clamps together) |
| Strength Profile | Rigid & Heavy-Duty | Flexible & Vibration-Resistant |
| Learning Curve | Steep (Requires practice) | Flat (Beginner friendly) |
| Cost of Entry | High ($) | Low ($) |
| Reversibility | Difficult (Must cut & grind) | Easy (Drill out & replace) |
Strength vs. Flexibility
- Welding: This is the best choice for heavy loads. Because it fuses the metal into one piece, it is extremely rigid. This is why you weld a trailer frame or a heavy workbench.
- Riveting: This wins for things that vibrate. Think about an airplane wing or an aluminum boat hull. According to the FAA’s aircraft structure guidelines, rivets are essential because they won’t crack under stress like rigid welds might. Rivets have a tiny bit of “give.” If those parts were welded rigid, the constant vibration might cause cracks over time.
Learning Curve and Mastery
- Welding: This has a high learning curve. It takes a lot of practice to make a bead that is safe and looks good. A bad weld might hold today but snap tomorrow.
- Riveting: This has a very low learning curve. It is hard to mess up a rivet. If you can drill a hole straight, the tool does the rest of the work for you.
Cost of Entry
- Welding: Be prepared to spend some money. You need a welding machine, bottles of shielding gas, a specific safety helmet, and fireproof gloves.
- Riveting: This is cheap. You can pick up a hand riveter and a bag of fasteners at the hardware store for less than the cost of lunch.
But price isn’t the only cost. You also need to consider the physical risks to your material and yourself. Let’s look at the real-world manufacturing constraints.
Practical Application Factors
Thermal Distortion and Warping
Pros call this “thermal distortion“. I call it the reason most beginners ruin their first sheet metal project.
The Problem:
When you weld a flat sheet of metal, you blast it with extreme heat. That makes the metal expand and contract rapidly. On thick steel, this isn’t a huge deal. On thin sheet metal, it is a disaster.
The Result:
Your nice, flat piece of metal ends up looking like a wavy potato chip. It buckles and twists. Once this happens, hammering it flat again is nearly impossible.
The Solution:
Riveting uses zero heat.
Because it is a cold process, your metal stays perfectly flat and straight. This is why airplanes are riveted. If you are working on body panels or skins, use rivets to avoid the warp.
Warped metal is annoying, but making a mistake you can’t fix is expensive. Let’s look at what happens when things go wrong.
💡 From the Factory Floor:
We once took an order for 50 large aluminum architectural panels. To keep the face ‘clean,’ we decided to TIG weld the stiffeners on the back instead of riveting them. It was a disaster. The heat caused immediate ‘oil canning’ (visible waves across) the flat surface. The client rejected the entire batch during QC. That single decision cost us thousands in scrapped material and delayed the shipment by two weeks. We switched to structural rivets for the reprint, and the panels came out dead flat.
Reversibility and Rework
Let’s be honest. Beginners make mistakes. Most guides talk about “maintenance,” but what you really care about is fixing a screw-up.
Riveting is forgiving.
If you put a rivet in the wrong spot, it is annoying, but doable to fix. You simply grab your drill and drill right through the center of the rivet head. It pops out, and the hole is ready for a new one. No harm done.
Welding is a nightmare to undo.
If you weld two pieces crooked, you can’t just unscrew them. You have to cut the metal apart with an angle grinder or a saw. Then, you have to grind the old weld down until it is flat again. It takes a long time, and you often lose material in the process.
The Verdict: If you are unsure of your design or just prototyping, rivet it first.
Now that we’ve covered the material risks, let’s talk about the most important factor: your personal safety.
Garage Safety 101
Most guides talk about industrial fumes. But if you are working in a cluttered home garage, you need to know about the immediate dangers.
| Risk Factor | Welding Risks | Riveting Risks |
|---|---|---|
| Primary Danger | UV Radiation, Fire, Burns | Flying Debris, Noise |
| Required PPE | Welding Helmet, Fireproof Gloves | Safety Glasses, Earplugs |
| Workspace | Fire-safe zone (No trash/gas) | Any clear workbench |
Welding Risks
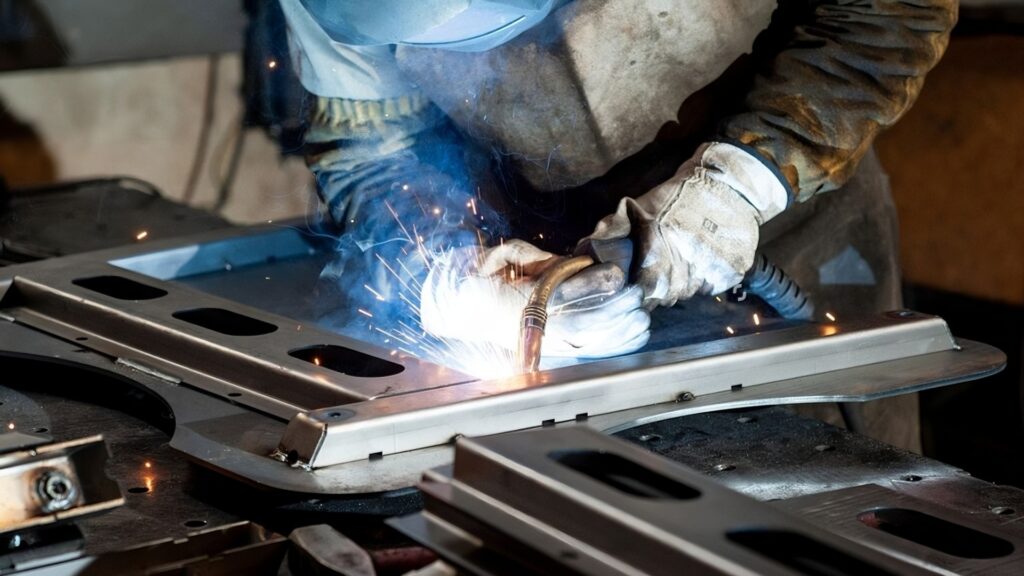
- UV Burn: Use a proper helmet. The electric arc is as bright as looking directly at the sun. If you look at it with naked eyes, you will damage them. It can even sunburn your exposed skin.
- Fire: Welding shoots hot sparks everywhere. You absolutely cannot do this near gas cans, wood piles, or full trash bins. One stray spark can burn your shop down.
💡 From the Factory Floor:
Never underestimate how far hot slag can travel. We once had a welder working on a rush order, and he didn’t pull the safety curtains fully close. A single hot spark flew 20 feet and landed in a bin of cardboard packaging materials. It created a smoldering fire that we didn’t smell until 10 minutes later. We almost triggered the overhead sprinklers, which would have ruined tons of inventory. Now, we strictly enforce a ‘35-foot clear zone‘ for all unshielded welding.
Riveting Risks
- Eyes and Ears: The biggest risks here are flying metal shards from drilling and the “pop” noise of the gun.
- Protection: Standard safety glasses and cheap earplugs are all you need.
Decision Time: Specific Scenarios
When to Choose Welding
When should you deal with the extra heat and cost?
Choose welding when strength is your number one priority. If you are building something that needs to support a lot of weight—like a heavy workbench, a trailer frame, or a car chassis—you need to weld it.
Here are the specific scenarios where welding wins:
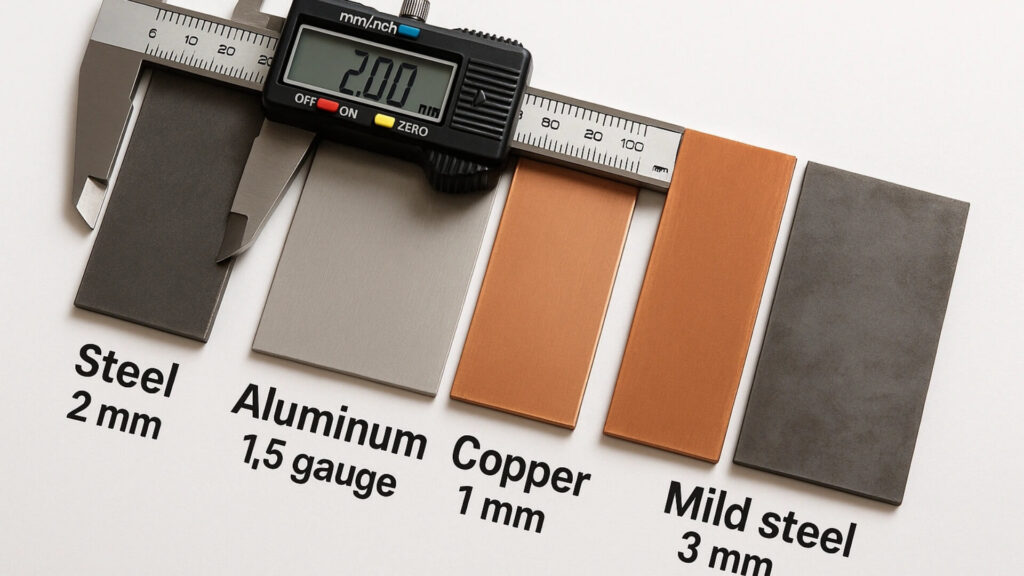
- You are working with thick metal. A good rule of thumb is anything 1/8 inch or thicker.
- You need a seamless finish. Since welding fuses the metal, you can grind the joint flat and paint over it. The seam becomes invisible.
- It needs to be leak-proof. If you are building a fuel tank or a water container, welding is the only way to get a perfect seal.
When to Choose Riveting
So, when should you grab the rivet gun instead?
Choose riveting for delicate work or when you need flexibility. It is often the smarter choice for projects that don’t require brute strength.
Here is when riveting is the way to go:
- You are working with thin sheet metal. If you try to weld very thin metal, you will likely burn a hole right through it. Rivets keep it intact.
- You are joining two different types of metal. You can’t easily weld aluminum to steel. The chemistry doesn’t work. Rivets don’t care about chemistry; they will pin any two materials together.
- You don’t have access to heavy power. Welders often need special electrical outlets. Hand riveters work anywhere.
- You want that “industrial” look. Sometimes, seeing the fastener heads is a style choice. It looks tough and mechanical.
Now you know the basics, the risks, and the costs. It’s time to make a final decision.
Still undecided? Use this cheat sheet to pick the right method for your specific job:
| Your Usage Scenario | Best Choice | Expert Reason |
|---|---|---|
| Heavy Load Bearing (Trailers, Benches) | Welding | Provides maximum rigidity and structural integrity. |
| Thin Sheet Metal (Body Panels) | Riveting | Avoids heat distortion (The “Potato Chip” effect). |
| Mixed Materials (e.g., Alum + Steel) | Riveting | Connects different material types without chemistry issues. |
| Watertight/Airtight (Fuel Tanks) | Welding | Creates a seamless, fused seal that won’t leak. |
| Complete Beginner (First Project) | Riveting | High margin for error; easy to fix mistakes. |
Conclusion
To sum it up, the choice comes down to your material and your goal.
Welding is the heavy hitter. Use it for ultimate strength and anytime you are working with thick metal structures that need to be watertight.
Riveting is the flexible friend. It is your best bet for delicate sheet metal, joining mixed materials, and keeping your surfaces flat and clean.
My final advice?
If you are just prototyping in your garage, start with a simple rivet gun. It’s the safest way to learn.
However, if you are moving from a prototype to full-scale production, the stakes get much higher. You don’t want to learn about “oil canning” or heat distortion on a batch of 500 units.
That is where we come in.
At ShincoFab, we handle these manufacturing decisions for clients globally every day. Whether your project requires high-precision TIG welding or structural riveting, our China-based team provides the professional sheet metal fabrication services you need to scale up without the stress.
You focus on the design, let us handle the connection.