Sick of blowing holes in thin sheet metal with your MIG welder? I’ve been there. I spent three weekends trying to patch a floor pan on a ‘65 Mustang, chasing burn-throughs with my MIG torch until I wanted to scream. After years of fabricating panels, I learned that sometimes the best tool wasn’t an arc welder at all—it was a spot welder.
But most guides read like a college physics textbook. When I bought my first handheld unit, I didn’t care about “joule heating implications”; I just wanted to know why my breaker kept tripping and why my welds were popping loose.
In this guide, I’ll strip away the jargon. You will learn exactly how spot welding works, the heavy reality of holding a 30lb machine, and the simple “Peel Test” to guarantee your welds never fail.
What Actually is Spot Welding?
Let’s strip away the engineering textbook definitions. Spot welding is exactly what it sounds like: welding two pieces of metal together at a single, pinpointed spot.
It is arguably the simplest way to join sheet metal. You don’t need a helmet with a darkening lens, and you definitely don’t need years of practice to make it stick.
No Filler, No Gas, Just Pressure
If you have ever tried MIG or TIG welding, you know the struggle. You have to buy expensive tanks of shielding gas, spools of wire, and filler rods. It adds up fast.
Spot welding throws all that out the window.
- No Wire: You aren’t adding any extra metal to the joint.
- No Gas: You don’t need to shield the weld from the air.
- No Consumables: Aside from electricity, you aren’t “using up” anything.
It works strictly on heat and pressure. You are simply using electricity to fuse the two existing sheets of new metal together. This makes it cleaner, cheaper, and much less hassle for a beginner to set up in a garage.
The “Nugget” Concept
So, how does the bond actually happen?
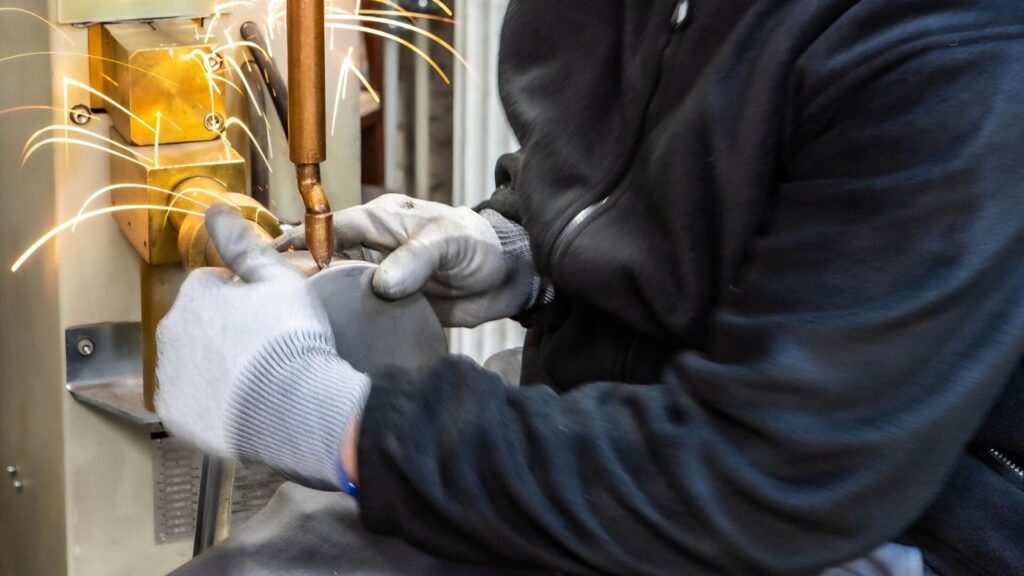
Imagine pinching two sheets of metal between two copper fingers (electrodes). When you pull the trigger, a massive jolt of electricity shoots from one finger to the other.
Because metal resists that flow of electricity, it gets hot. Extremely hot.
The heat melts the metal right in the center where the two sheets touch. This creates a tiny pool of liquid steel between the layers. We call this the “nugget.”
When the current stops, that nugget cools down instantly. The liquid turns back into solid metal, and your two separate sheets are now physically fused into one piece at that specific dot. From the outside, you might just see a small dimple, but the inside is locked tight.
Now that you know what it is, let’s look at why you actually want to use it.
The Pros and Cons of Spot Welding
Is this the right tool for your specific project? It depends. Spot welding is a specialized skill, not a magic wand for every repair.
Pros (Why You Should Use It)
There are three big reasons why auto shops and factories love this process.
- Speed: It is incredibly fast. A typical weld takes less than one second. You can zip through a panel repair in a fraction of the time it takes to MIG weld it.
- Neatness: There is no messy bead to grind down. The metal stays flat. If you are doing bodywork, this means less filler and less sanding later.
- No Recurring Costs: This is the best part for your wallet. No wire spools. No shielding gas tanks. Once you buy the machine, it basically runs for free.
Cons
However, a spot welder can’t replace your standard welder entirely. It has strict physical limits.
- Limited Joints: You are stuck with “lap joints.” This means the metal sheets must overlap flat against each other. It won’t work for joining tubes, corners, or thick structural beams.
- Reach Issues: You are limited by the length of the tongs. If you need to weld the center of a large car hood, the machine arms might not reach deeply enough. You are mostly limited to working near the edges of metal sheets.
If the pros outweigh the cons for you, the next step is determining if your materials are compatible.
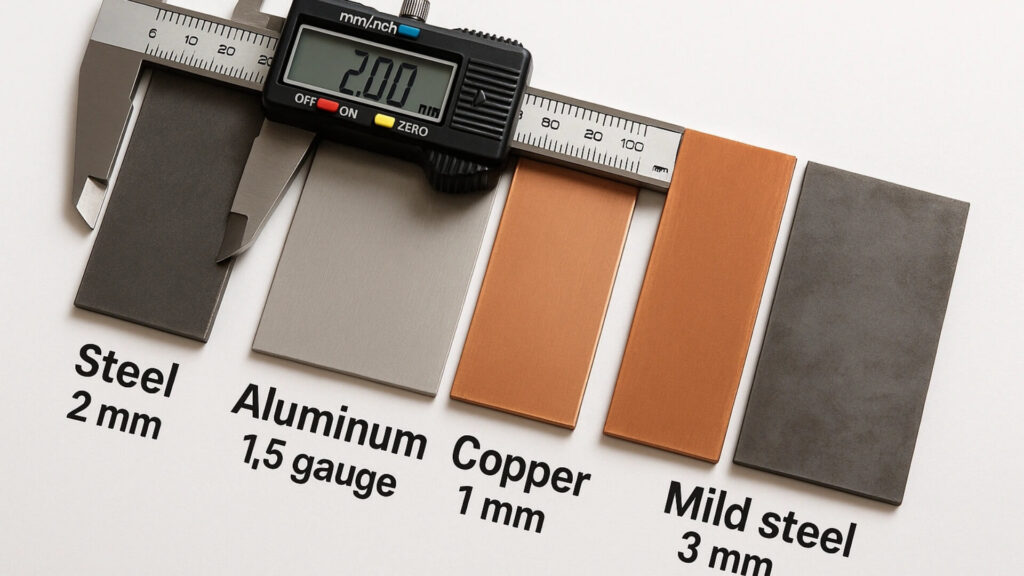
Best Metals for Spot Welding (And Ones to Avoid)
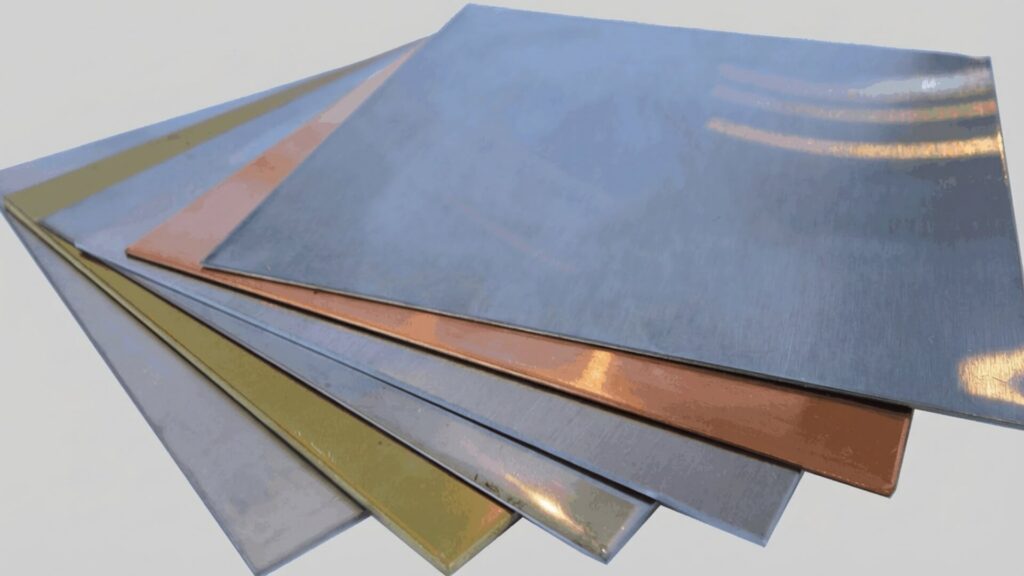
Not all metals are created equal. Some want to be spot welded, while others will fight you every step of the way. Knowing the difference will save you a lot of headache.
Low Carbon Steel (Best for Beginners)
If you are new to this, start here. Low carbon steel (often called mild steel) is the easiest material to learn on.
It has the perfect balance of electrical resistance. It gets hot quickly, melts predictably, and fuses strong. It is extremely forgiving of beginner mistakes. If your timing is slightly off, mild steel will usually still hold together.
Stainless Steel
Stainless steel is fully weldable, but it has a different personality.
It has higher electrical resistance than mild steel. This means it heats up much faster. Because it gets so hot so quickly, you usually need to dial back your settings. Use less current or a shorter weld time. If you treat it exactly like mild steel, you might overheat the metal and warp your project.
Aluminum (Harder Than You Think)
You might think aluminum would be easy because it’s light. It’s actually a nightmare for most home spot welders.
Aluminum conducts electricity extremely well—almost as well as copper. Instead of resisting the current and creating heat, aluminum lets the electricity pass right through. To get a “nugget” to form, you need a massive surge of power.
Most affordable, handheld units just don’t have enough juice to handle it. You generally need expensive, industrial-grade equipment to spot weld aluminum reliably.
Galvanized Steel(Safety Warning)
You need to be careful here. Galvanized steel is regular steel coated in zinc to prevent rust.
When you heat zinc, it burns off and creates a white smoke. This smoke is toxic. Breathing it in can cause “metal fume fever,” which feels like a terrible flu.
The zinc also acts like a glue on your copper electrodes. You will hear a distinct “sizzle,” and your tips will stick to the metal. If you must weld this, grind the zinc off strictly, wear a P100 respirator, and keep a file handy to clean your tips after every few welds.
Now let’s look at the actual gear that makes this happen.
The Core Equipment You Need
You don’t need a van full of tools to start spot welding. The machine itself is relatively simple, but every part plays a specific role in making that weld stick.
The Power Source (Transformer)
The heavy box at the heart of your welder is a transformer. Its job is to change the electricity coming from your wall outlet.
It takes high voltage and converts it into high current.
Think of it like a pressure washer versus a fire hose. You don’t need high pressure (voltage); you need a massive volume of water (amps). A spot welder pumps thousands of amps into the metal. That surge of power causes the rapid heating required to melt steel instantly.
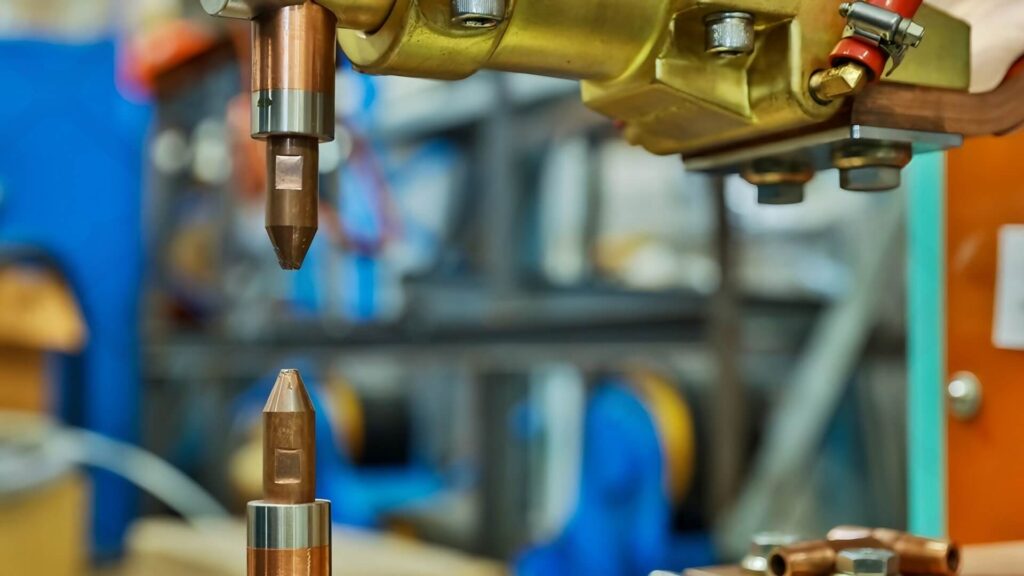
Copper Electrodes
The “fingers” that actually touch your metal are always made of copper. You might wonder, why not steel?
If the tips were steel, they would melt and weld themselves right to your project. That would be a disaster.
Copper is special because it is a fantastic conductor. It lets electricity flow through it easily without generating much heat. The steel workpiece, however, resists the electricity, which is what creates the heat. The copper tips actually help pull heat away from the surface, ensuring the melt happens inside the sheets, not on the outside.
Tongs and Lever Arms
This is the muscle of the operation. The tongs are the long arms that hold the electrodes, and the lever moves them.
Whether you are using a hand-held lever or a foot pedal on a larger machine, these arms provide mechanical leverage. They allow you to apply hundreds of pounds of pinching force with just a squeeze of your hand. This force is what keeps the metal flat and the current focused.
Understanding the internal parts is useful, but which type of machine should you actually buy?
Handheld vs. Pedestal: Which Machine Do You Need?
Most guides lump all spot welders into one category, but that’s confusing. There are two very different tools for two very different jobs.
You need to decide if you are bringing the welder to the work, or the work to the welder.
Handheld (Tongs)
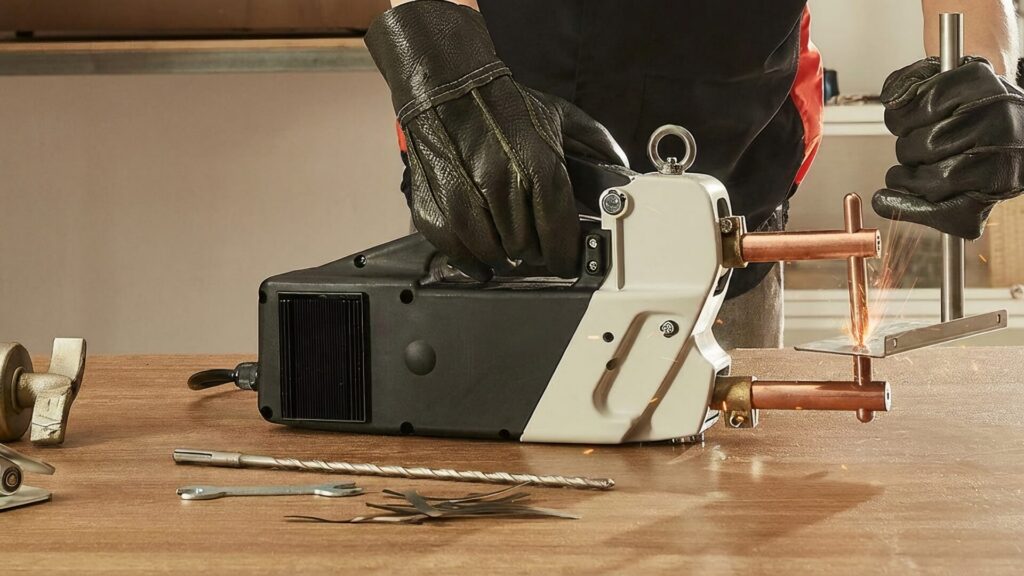
This is the standard choice for DIYers and auto body repair.
It looks like a heavy, oversized pair of pliers connected to a power cord. You physically hold it, lift it, and clamp it onto your material. These are extremely popular because they are portable.
If you are fixing a rusted fender on a classic car, you can’t put the whole car on a workbench. You have to carry the welder to the car.
- Cost: Affordable. You can find decent starter units for $150 to $300.
- Best For: Repairs, large objects, and hobbyists.
- Downside: They get heavy—fast. Holding a 30-pound unit at shoulder height to weld a door frame feels like a gym workout. After the third weld, your arms will start to shake, which can ruin your alignment.
- Pro Tip: Watch your extension cord. I once thought my welder was broken because the welds were weak. It turned out I was using a cheap, thin extension cord. These machines are power-hungry; if you starve them with a long, thin cord, you lose the amperage needed to make the weld stick. Plug directly into the wall if you can.
Pedestal (Stationary)
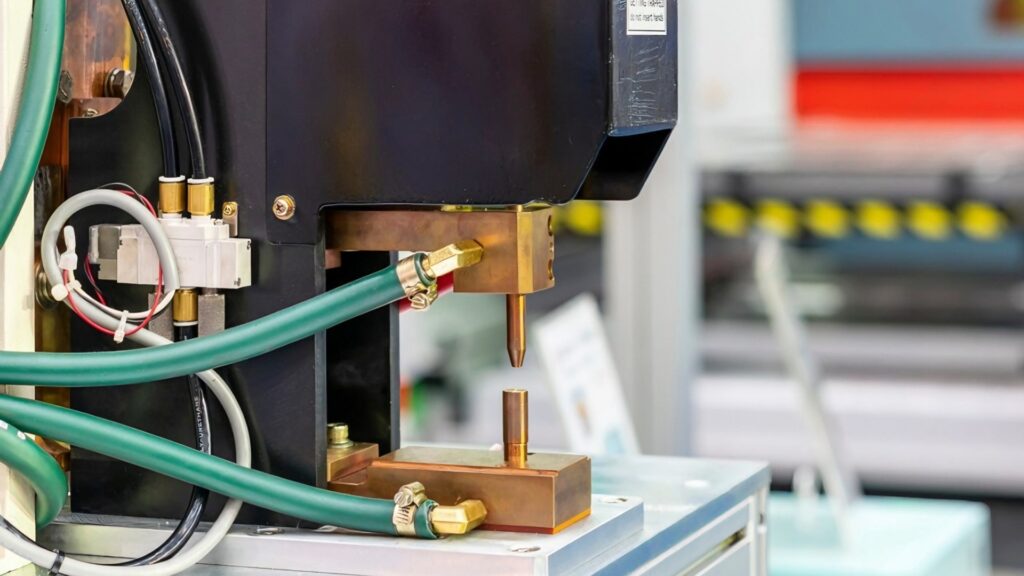
This is the big rig. It stands on the floor or sits bolted to a heavy bench.
You don’t hold the welder. Instead, you hold your metal part and slide it between the electrodes. You control the clamping force with a foot pedal, which leaves both of your hands free to align the metal.
- Cost: Expensive. These are industrial machines.
- Best For: Production work. If you are building 500 small metal brackets, this is the only way to go.
- Downside: You can’t move it. You have to bring every single part to the machine.
Whichever machine you choose, it is practically a paperweight if you skip the most important step of the entire process: cleaning.
Essential Surface Prep
Most beginners blame the machine when their welds fail. But 90% of the time, the problem isn’t the welder. It’s the dirt on the metal.
Spot welding works entirely on electrical resistance. For the resistance to generate heat, the electricity actually has to make it into the metal first.
Rust, paint, and mill scale (that dark coating on new steel) act like a rubber wall. They are insulators. They stop the flow of current dead in its tracks.
If you try to weld over paint or rust, one of two things will happen:
- Nothing: The machine hums, but no current flows because the circuit is broken.
- The “Pop”: The current fights its way through a tiny gap. Instead of a smooth buzz, you’ll hear a loud “CRACK” like a gunshot. The metal essentially explodes at the contact point, leaving you with a jagged hole and molten splatter on your shirt.
This isn’t like Stick or Flux Core welding. Those methods are aggressive; they can burn right through a layer of rust and still hold. Spot welding is not that forgiving. It requires perfect contact.
Before you clamp down, take a grinder or sandpaper to your sheets. Remove every speck of oil, rust, or coating. The metal needs to look like a mirror. If it isn’t bare and shiny, it isn’t ready to weld.
Now that your metal is prepped and your machine is set, you are ready to start sticking metal together.
How the Process Works (Step-by-Step)
The spot welding cycle is fast. In an automated car factory, it happens faster than you can blink. But even if you are doing it manually in your garage, the physics are exactly the same.
It breaks down into four distinct phases.
1. Squeeze Time
Before you ever hit the power switch, you have to clamp down.
The copper electrodes (the tongs) close onto your metal sheets. At this stage, there is no electricity flowing. You are just applying raw mechanical force.
This pressure is vital. It forces the two sheets of metal tightly together, closing any gaps. If you try to run current before the pressure is set, the electricity will arc, sparks will fly, and you will burn a hole right through your project.
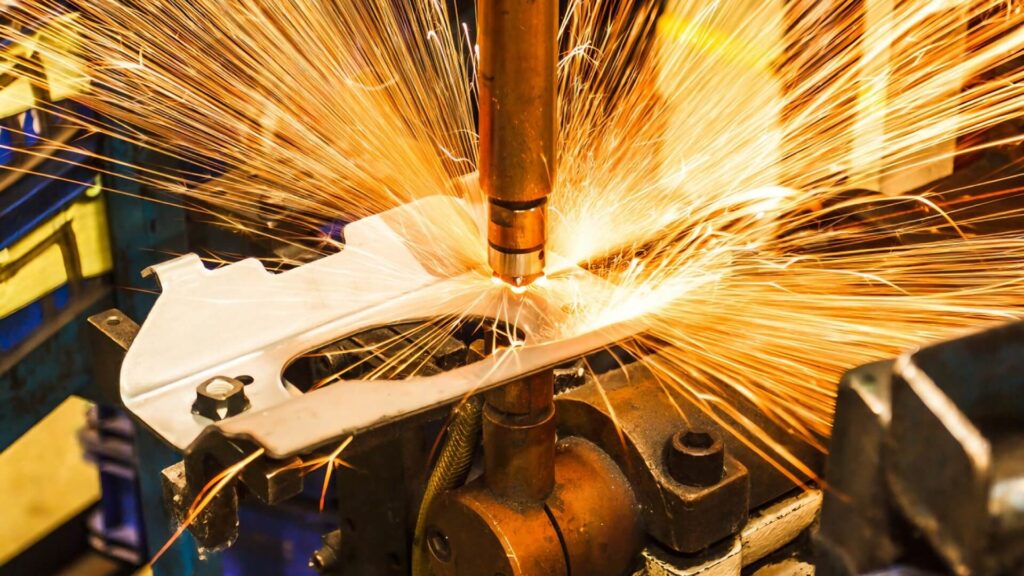
2. Weld Time
This is the main event.
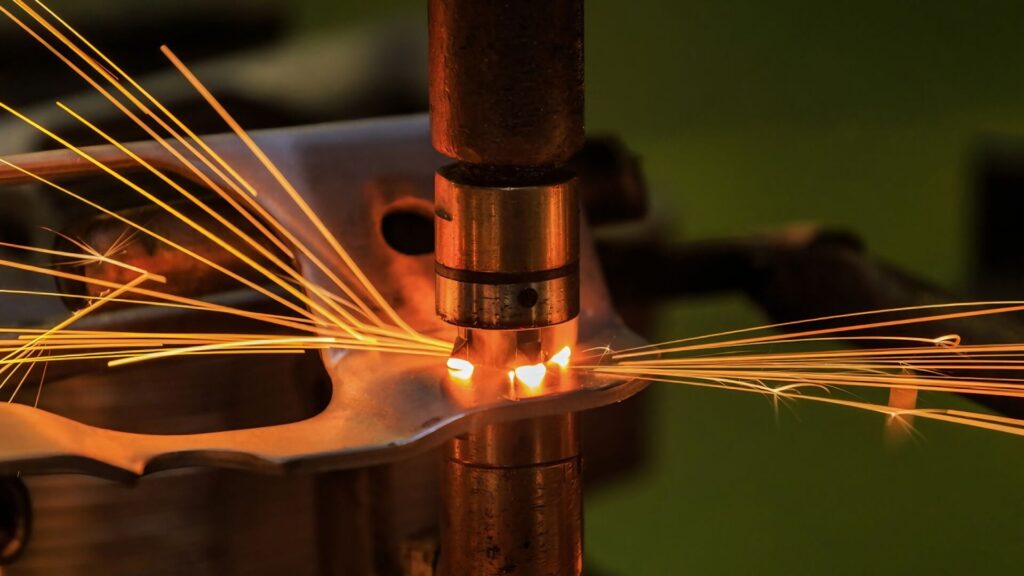
Once the pressure is stable, the machine sends a high electric current through the tips. This usually lasts for a fraction of a second.
Because the metal sheets resist the flow of electricity, heat builds up instantly at the point where they touch. That hidden “nugget” melts into a liquid pool. The copper tips stay cool, but the steel between them hits melting point.
3. Hold Time
This is the step most beginners forget.
After the electric current stops, you must keep squeezing.
The weld nugget is still liquid hot. If you release the pressure now, the joint will pop open and fail. By holding the pressure for an extra second, you allow the nugget to cool down and solidify. The pressure acts like a clamp while the “glue” dries.
4. Release
Now you can let go.
The metal has cooled enough to hold its shape. You open the tongs, release the pressure, and move the workpiece to the next spot.
You have completed the steps—but how do you know if the weld actually held? You need to test it.
How to Know Your Weld is Strong(Peel Test)
Most industry guides will tell you to inspect your welds with “ultrasonic testing” or X-ray equipment. That is useless advice for a DIYer. You don’t have an X-ray machine in your driveway.
So, how do you trust a weld you can’t see? You have to destroy it.
This is called the Peel Test. It is the absolute best way to dial in your machine settings before you touch your actual project.
How to Do It
- Take two pieces of scrap metal. Make sure they are the same thickness as the project you are about to build.
- Weld them together with a single spot.
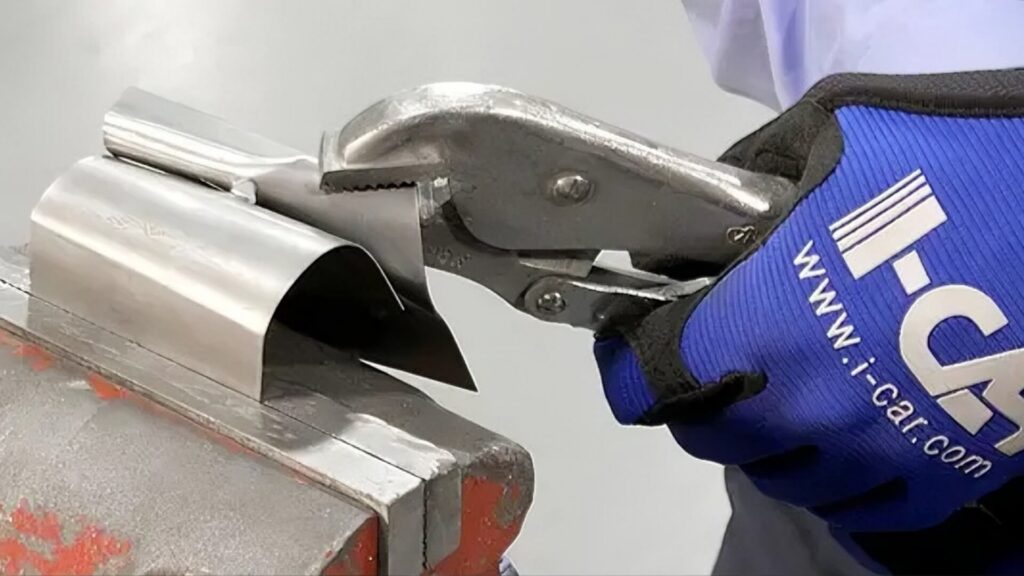
- Now, rip them apart. Put one piece in a vise, grab the other with pliers, and peel it back like a banana skin.
Reading the Results
If the two sheets pop apart cleanly at the joint, you failed. That is a “cold weld.” It means the metal didn’t fuse, and you need more power or hold time.
You know you have a perfect weld when the metal actually tears.
A good nugget is stronger than the sheet metal surrounding it. When you peel the sheets apart, the weld shouldn’t break. Instead, the steel should rip. You want to see a hole torn out of one sheet, and a metal “button” left stuck to the other.
If you didn’t get the “button,” or if the weld popped apart instantly, don’t worry. Here is how you fix it.
Common Beginner Mistakes
Every beginner ruins a few pieces of metal. It is part of the learning curve. If your first few welds fail, don’t panic. Here is usually what went wrong.
Weak or “Cold” Welds
This is the most common issue. The weld looks fine from the outside, but the sheets pull apart with almost no effort. Usually, you didn’t enough start power. The setting was too low to melt the nugget.
Surprisingly, the problem can also be too much pressure. It sounds backward, but if you squeeze too hard, you lower the electrical resistance. Lower resistance means less heat. If you are really cranking down on the tongs and getting weak welds, try backing off the pressure slightly.
Blowing Holes in the Metal
This is the opposite problem. You pull the trigger, hear a loud POP, and see a hole where metal used to be.
You cooked it.
You likely held the trigger down for too long. The metal got so hot it just dripped away. It can also happen if your electrodes are misaligned or sitting right on the edge of the sheet. The current concentrates on the edge and blows it out.
The “Edge Blowout”
When you are patching a panel, it’s tempting to put a weld right on the very edge of the seam. Don’t do it.
I’ve ruined perfectly good fenders doing this. If the electrode is too close to the edge (less than the diameter of the weld nugget), the liquid metal has nowhere to contain itself. It will squirt out the side like a jelly donut, leaving a messy notch that you’ll have to fill later. Always leave at least 1/4 inch of metal around your weld spot.
Too Much Splatter
Spot welding should be fairly clean. If it sounds like a firecracker and shoots sparks across your garage, something is wrong.
Check your surfaces. Rust, paint, and oil are the enemies of a good weld. They cause the electricity to arc violently.
Also, check for gaps. If the two sheets aren’t touching perfectly flat, the electricity has to “jump” across the air gap. That jump causes an explosion of molten metal.
Frequently Asked Questions
Do I need a welding helmet for spot welding?
No. Unlike MIG or TIG welding, spot welding does not create a blinding UV arc that burns your eyes (or “flash burn”). However, it does shoot out hot sparks. You don’t need a darkening helmet, but you absolutely must wear clear safety glasses and heavy leather gloves.
How thick of metal can I weld?
This depends on your machine, but handheld units have limits. A standard 110V or 220V handheld spot welder can usually handle two sheets of 16-gauge to 20-gauge steel (about 1/8 inch combined thickness). If you try to weld thick structural steel beams, you won’t get enough heat to form a nugget.
Can I spot weld without cleaning the metal?
No. This is the number one reason beginners fail. Electricity cannot flow through rust, paint, or mill scale. If you don’t grind the metal down to bare, shiny steel, the machine will sputter, pop, or simply do nothing at all.
Is spot welding strong enough for structural repairs?
In a factory, yes—cars are held together by thousands of spot welds. But for a DIYer with a handheld unit? Be careful. It is perfect for body panels, battery tabs, and sheet metal skins. For heavy load-bearing frames or roll cages, stick to MIG or TIG welding for maximum penetration and safety.
Why are my tips turning black?
This is usually contamination. If you weld on dirty metal or galvanized (zinc-coated) steel, a layer of gunk will build up on your copper tips. This ruins their conductivity. You need to dress (clean) your tips regularly with a file or sandpaper to keep the copper bright and conductive.
Conclusion
Whether you are restoring a classic Mustang or building a custom battery housing, remember that successful spot welding is 80% preparation and 20% pulling the trigger. Don’t let the first few blown holes discourage you. Once you master the rhythm of clean metal, proper alignment, and steady pressure, you will find it to be one of the most satisfying tools in your shop.
However, there is a physical limit to what you can achieve with a handheld unit. As we discussed, manual spot welding is perfect for repairs and prototypes, but it doesn’t scale. If you look at your design and realize you need to produce 500 or 5,000 identical parts, your arm—and your breaker box—will likely give out before the job is done.
When a project outgrows the garage and requires industrial precision, that is where professional fabrication takes over. At ShincoFab, based in the manufacturing hub of Dongguan, China, we support global clients who need to move from prototype to mass production. We utilize the kind of automated, high-amperage stationary welding systems that ensure every single joint passes the stress test—so you don’t have to peel them apart yourself.
For now, grab your grinder, clean those sheets, and start practicing. But when you are ready to turn a one-off project into a full production run, we are here to handle the heavy lifting.